Single-Sign-On
Allow single sign-on to an Exoscale organization using an OpenID Connect (OIDC) identity provider. SSO is available to every Exoscale organization.
Activation
Accessible to users with OWNER user role in the IAM section of the main navigation, under SSO.
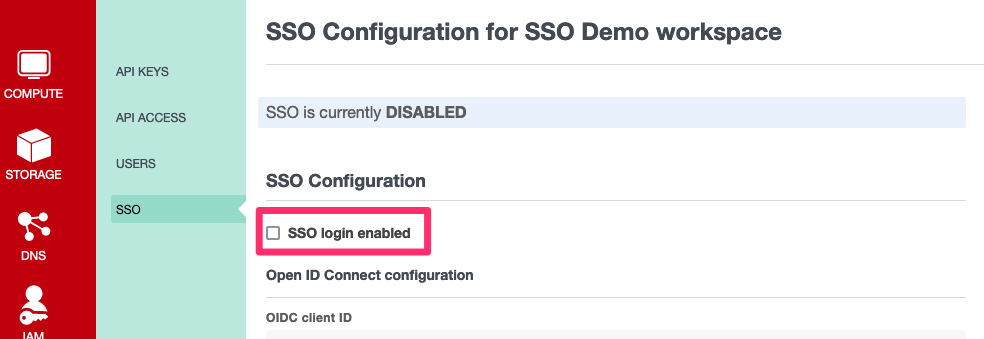
Configuration
Accessible to users with OWNER user role in the IAM section of the main navigation, under SSO.
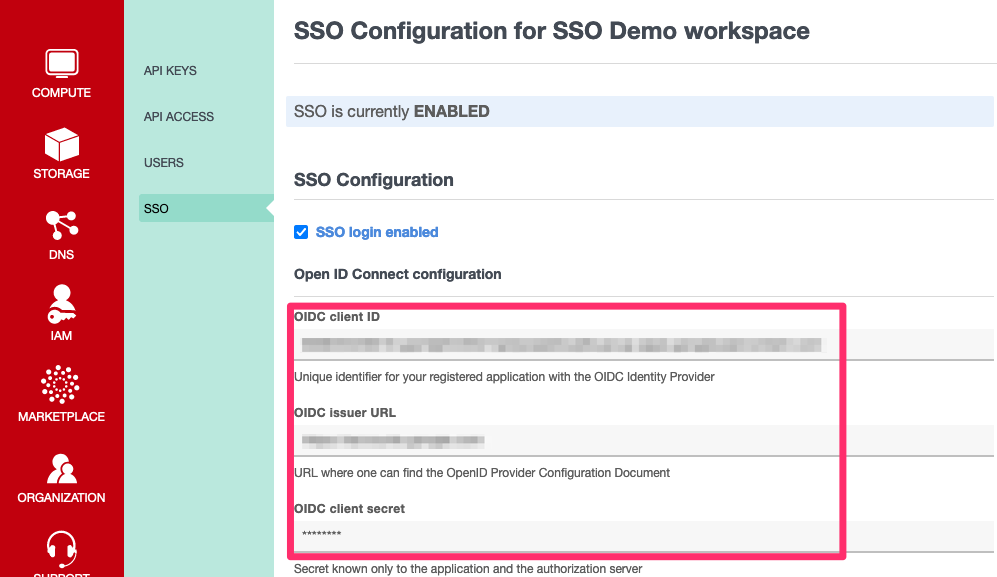
You need to enter:
- your OIDC
Client ID - the OIDC
Issuer URL - your OIDC
Client Secret
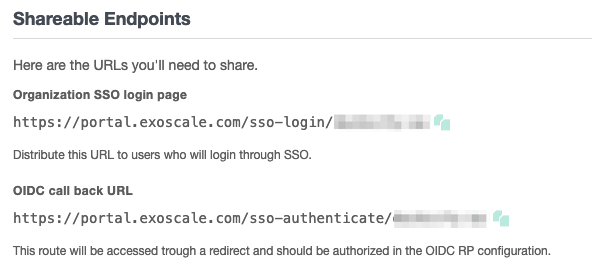
This is the URL you need to authorize on the OIDC provider side: https://portal.exoscale.com/sso-authenticate/<sso-org-name>
Login
The URL for the SSO login page: https://portal.exoscale.com/sso-login/<sso-org-name>
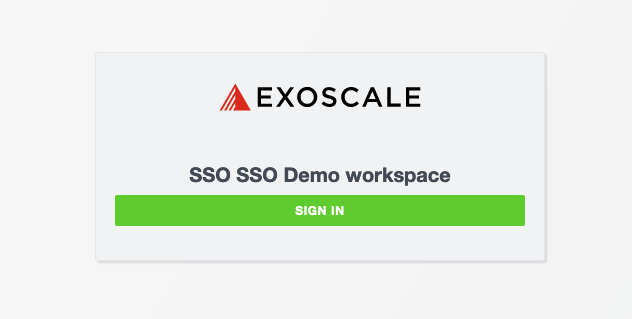
When a user logs in to an organization using SSO for the first time, a new, unique user is created inside this organization. No role is assigned automatically: the user’s IAM role is whatever the CEL authorization expression returns, and the login only succeeds when that expression returns a valid role.
The username is a universally unique identifier (or UUID) to allow for a standard non-SSO user with the same email address.
How SSO users work
When a user successfully authenticates through the configured OIDC provider, Exoscale creates a dedicated SSO user inside the organization.
An SSO user is different from a standard Exoscale user:
- it is created automatically on the first successful SSO login;
- it does not require a local Exoscale password;
- its authorization is controlled by the configured OIDC provider and the CEL authorization expression.
Internally, SSO users are identified independently from standard Exoscale accounts, even if both share the same email address.
SSO users are organization-specific
An SSO user belongs to the organization where it was created.
If another organization also wants to use SSO authentication, SSO must be configured independently for that organization.
An SSO user created in organization A cannot be reused automatically in organization B if organization B does not use SSO.
Authorization
You can authorize in two ways:
- Use an ID token introspection with a Common Expression Language (or CEL) query.
- Set up your own proxy with a DEX server or equivalent.
Authorization with ID token introspection
Two settings drive the introspection:
OIDC Additional Claims, which is appended to the OAuth scopes requested at login- a
Common Expression Language Authorization Expression, which is evaluated at login time against the ID token payload
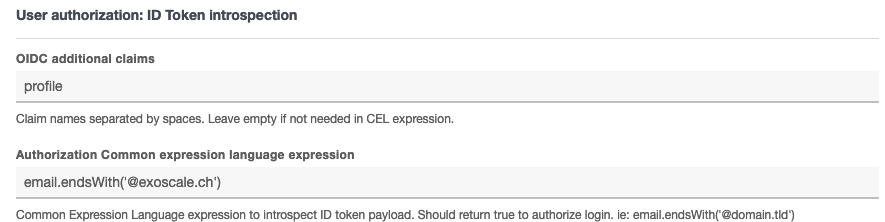
OIDC additional claims
The authentication request always includes the openid profile email scopes, so the standard claims they carry (sub, email, name, …) are always available to the expression.
The OIDC Additional Claims value is appended to that scope string: Exoscale requests openid profile email <additional claims>. Enter space-separated, lower-case tokens made of letters, numbers, hyphens, underscores or colons.
Requesting a scope only helps if your identity provider maps it to a claim. How additional claims get released into the ID token differs per provider: Okta uses custom scopes, Entra ID uses app-registration token configuration, Auth0 uses Actions. The examples below give the exact value to enter for each provider. A claim is visible to the CEL expression only if the ID token actually contains it.
Common Expression Language Authorization Expression
The expression is evaluated at every login against the ID token payload. Each claim in the token is exposed as a variable named after the claim, keeping its JSON type (string, number, boolean or list).
The expression must return a string holding either:
- the UUID of an IAM role of the organization, or
- the name of an existing IAM role of the organization.
That role is assigned to the user, and is re-evaluated and updated as needed at every subsequent login. Changing the role returned by the expression is therefore enough to change what users get on their next login.
Any other outcome denies the login: a boolean such as true, an empty value, a role name or UUID that does not exist in the organization, or an evaluation error, for instance when the expression references a claim the token does not contain. When a first SSO login is denied, no user is created.
email.endsWith('@exoscale.com') ? 'dc097e90-4636-4d2a-a629-670ab4395209' : false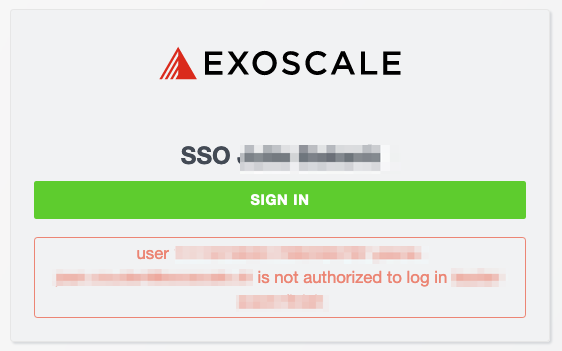
Examples
Each example shows the relevant excerpt of the ID token payload, the value to enter in OIDC Additional Claims, and the expression to configure. The role UUIDs are placeholders: replace them with the UUIDs of your own IAM roles, visible in the portal under IAM > Roles.
Okta
Create a groups scope on the Okta authorization server and add a Groups claim to the ID token. The claim type and filter you configure decide whether group names or group IDs are released.
OIDC Additional Claims: groups
{
  "iss": "https://example.okta.com",
  "sub": "00u9r1abcdefghijklmnopqrstuvwxyz",
  "email": "jane@example.com",
  "groups": ["Everyone", "exoscale-admins", "platform-engineers"]
}groups.exists(g, g == 'exoscale-admins')
? '00000000-0000-4000-8000-000000000001'
: groups.exists(g, g == 'platform-engineers')
? '00000000-0000-4000-8000-000000000002'
: falseMicrosoft Entra ID
Add the roles and groups claims through the app registration Token configuration; they cannot be requested through scopes. The roles claim carries the app roles assigned to the registration, the groups claim lists group object UUIDs and is omitted when the user belongs to more than 200 groups, so prefer app roles.
OIDC Additional Claims: leave this empty.
Entra sometimes omits the email claim. Exoscale needs it to create the SSO user: enable the email optional claim in the app registration, or make sure the user’s mail attribute is set in the directory.
{
  "iss": "https://login.microsoftonline.com/00000000-0000-0000-0000-000000000000/v2.0",
  "sub": "...",
  "email": "jane@contoso.com",
  "upn": "jane@contoso.com",
  "roles": ["exoscale-operator"],
  "groups": ["8c3a1e4f-2b6d-4f0a-9d3e-5a7c1b9d0e11"]
}roles.exists(r, r == 'exoscale-operator')
? '00000000-0000-4000-8000-000000000001'
: groups.exists(g, g == '8c3a1e4f-2b6d-4f0a-9d3e-5a7c1b9d0e11')
? '00000000-0000-4000-8000-000000000002'
: falseGoogle Workspace
Google returns the hd (hosted domain) claim automatically for Workspace accounts and does not release group membership in ID tokens, so mapping a domain to a role is the realistic option.
OIDC Additional Claims: leave this empty.
{
  "iss": "https://accounts.google.com",
  "sub": "108440123456789012345",
  "email": "jane@example.com",
  "hd": "example.com"
}
hd == 'example.com' ? '00000000-0000-4000-8000-000000000001' : falseAccounts outside your Workspace domain, for instance personal Gmail accounts, carry no hd claim: an expression that tests hd fails and their login is denied. To allow specific Gmail accounts, match their email claim, which is always present:
{
  "iss": "https://accounts.google.com",
  "sub": "104890123456789012345",
  "email": "contractor@gmail.com"
}
email in ['contractor@gmail.com', 'auditor@gmail.com']
? '00000000-0000-4000-8000-000000000002'
: falseTo run this setup without a Workspace domain, create your own OAuth client in the Google Cloud console:
- Choose the External audience. Gmail accounts cannot sign in to an Internal client.
- Set the authorized redirect URI to
https://portal.exoscale.com/sso-authenticate/<sso-org-name>. - Enter the client ID and client secret on the Exoscale SSO settings page, with the issuer URL
https://accounts.google.com.
Exoscale requests only the openid, email and profile scopes, and Google requires no verification for them.
The expression is the only access gate: any Google account can complete the sign-in flow against your organization. List the accepted addresses explicitly, and deny every other login.
For group-based roles, Google’s own ID tokens are not enough: put Dex in front of Google. Dex’s Google connector fetches a user’s Workspace groups through the Admin Directory API, using a service account with domain-wide delegation and a Groups Reader admin to impersonate, and re-exposes them as a groups claim in Dex’s own ID tokens. Dex releases that claim only when the groups scope is requested, so enter it as an additional claim:
OIDC Additional Claims: groups
Groups are listed as their Workspace email addresses:
groups.exists(g, g == 'admins@example.com')
  ? '00000000-0000-4000-8000-000000000001'
  : false
Auth0
Auth0 namespaces custom claims with your API identifier, for example https://exoscale.example.com/roles, and such names cannot be referenced from a CEL expression. Inject a non-namespaced claim into the ID token with a Post Login action instead:
event.response.idToken.setCustomClaim('exoscale_roles', event.authorization.roles);OIDC Additional Claims: leave this empty.
{
  "iss": "https://example.eu.auth0.com/",
  "sub": "auth0|60f1a2b3c4d5e6f7a8b9c0d1",
  "email": "jane@example.com",
  "exoscale_roles": ["exoscale-admin"]
}exoscale_roles.exists(r, r == 'exoscale-admin')
? '00000000-0000-4000-8000-000000000001'
: '00000000-0000-4000-8000-000000000002'This maps every authenticated user to at least the second role; end with : false instead to deny users without a matching role.
Interaction with Two-Factor Authentication
SSO and 2FA are complementary features.
Standard authentication
Users authenticating with an Exoscale username and password can enable Two-Factor Authentication on their account.
If an organization enforces Two-Factor Authentication, those users must complete the TOTP challenge before accessing the organization.
SSO authentication
Users authenticating through SSO do not use an Exoscale password.
Authentication is delegated to the configured OIDC provider.
If the identity provider already enforces Multi-Factor Authentication, users complete MFA on the provider side before being redirected back to Exoscale.
Mixed environments
It is possible to use both authentication methods within the same organization.
Removal of SSO users
Every time a new SSO user is recognized by Exoscale, a new special account is created on the platform. You can see all of your Organization’s users in the user management view in the web portal: IAM > Users.
In order to fully remove a SSO user, it is not enough to remove it from your Exoscale Organization, you will also need to prevent his ability to login via the OIDC provider, or the user will simply be recreated at its next login.