Managing SKS cluster in SUSE Rancher
This page is a step-by-step guide to creating an SKS cluster using SUSE Rancher.
Running Rancher
To show the entire process, we first need a running Rancher instance. Let’s create one. First, we run an Exoscale instance of type Large, named rancher.
exo compute instance add rancher --instance-type largeTip
We can use the shortened version of this command
exo c i add rancher --instance-type large
Next, we run a shell inside it. The exo CLI has a handy command for this purpose.
exo c i ssh rancherNext, we install Docker as we’ll use it to run Rancher.
curl -sSL https://get.docker.com | bashNext, we add the current user to the docker group.
sudo usermod -aG docker $USERAfter this step, we need to close the shell and open a new one so the changes are applied.
Then, we install Rancher using the single node installation method.
Note
We should not use the installation method in a production environment, but it is perfectly fine for this guide.
docker run -d --restart=unless-stopped \
  --name rancher \
  -p 80:80 -p 443:443 \
  --privileged \
  rancher/rancher:latest
Using the instance’s IP address, 194.182.165.191 in this example, we can access Rancher’s UI.
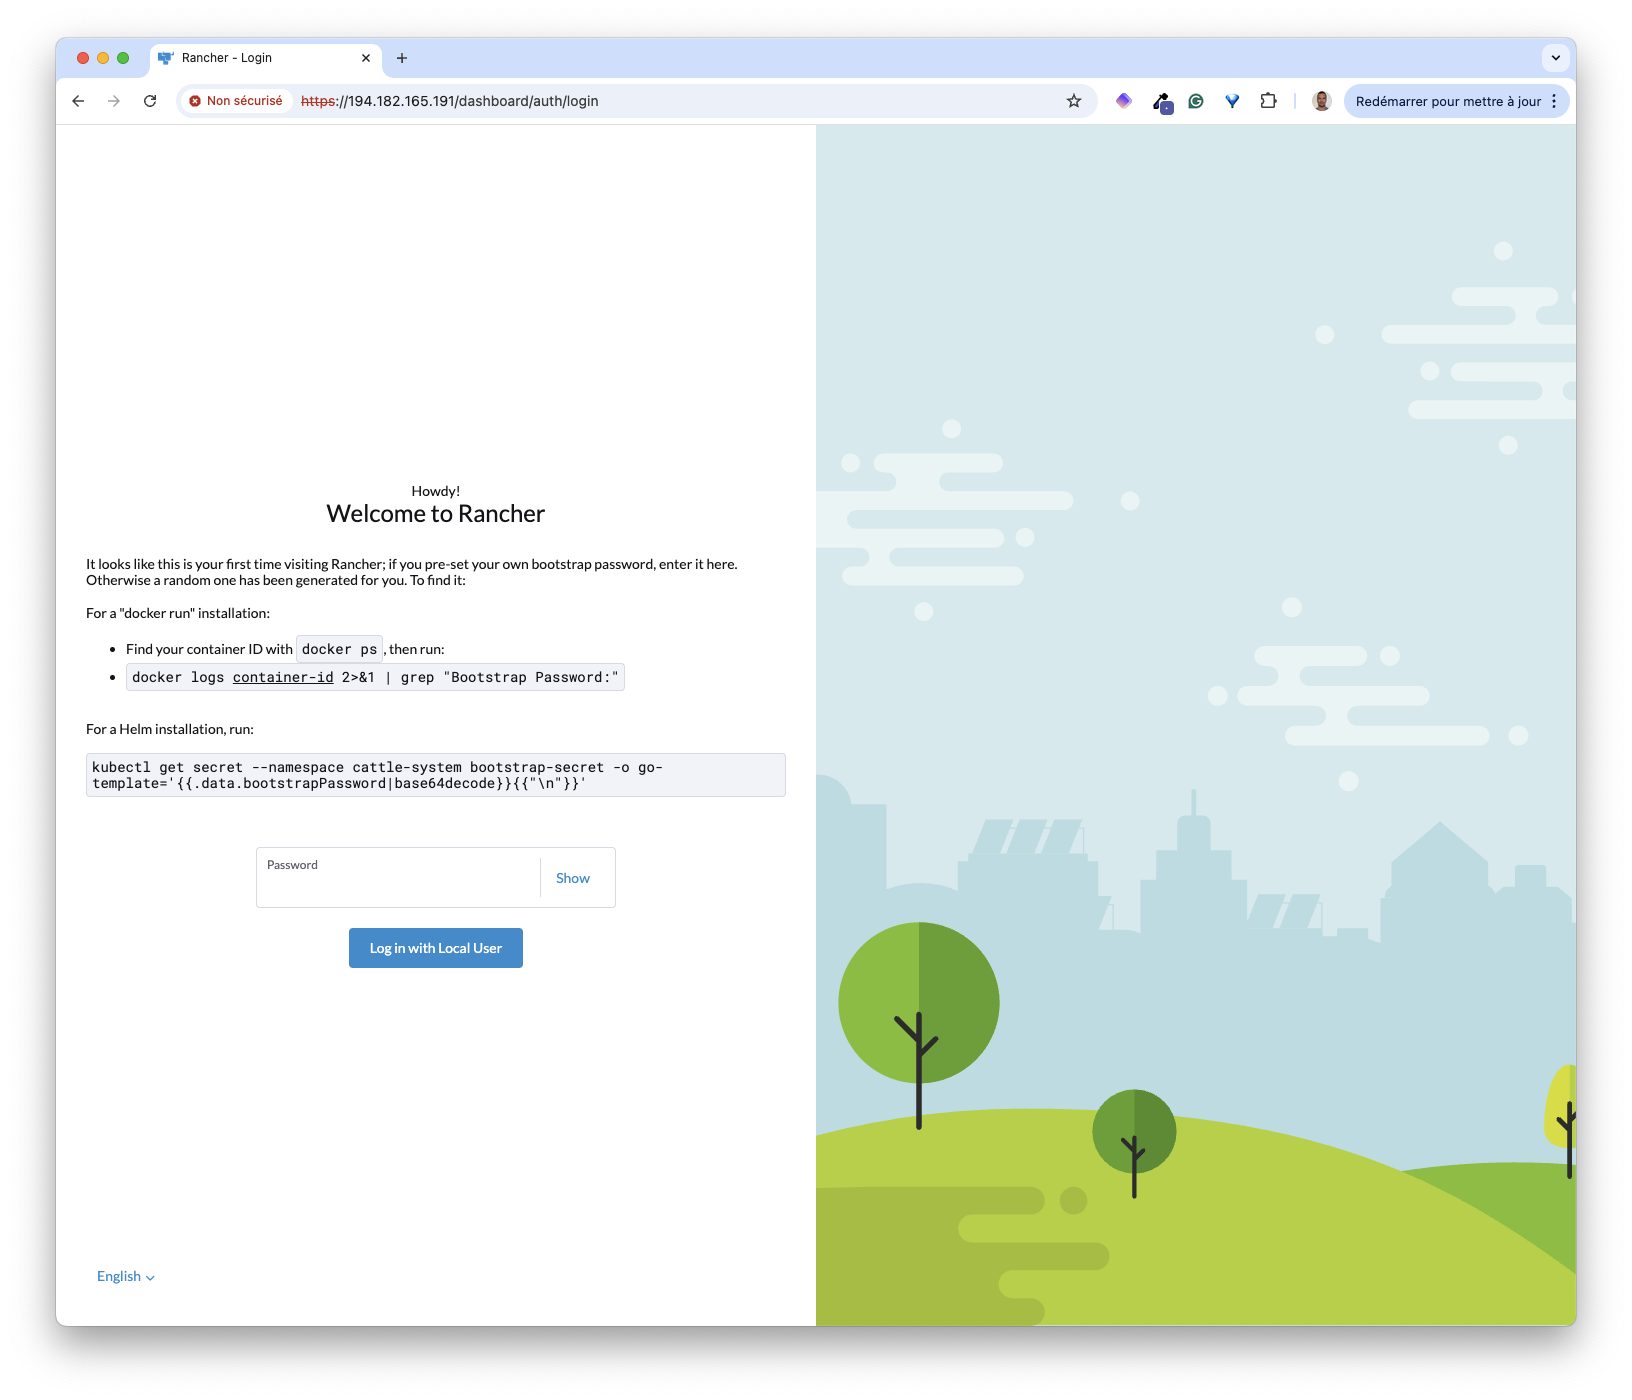
We retrieve the bootstrap password from the container’s logs using the provided command.
ubuntu@rancher:~$ docker logs rancher 2>&1 | grep "Bootstrap Password"
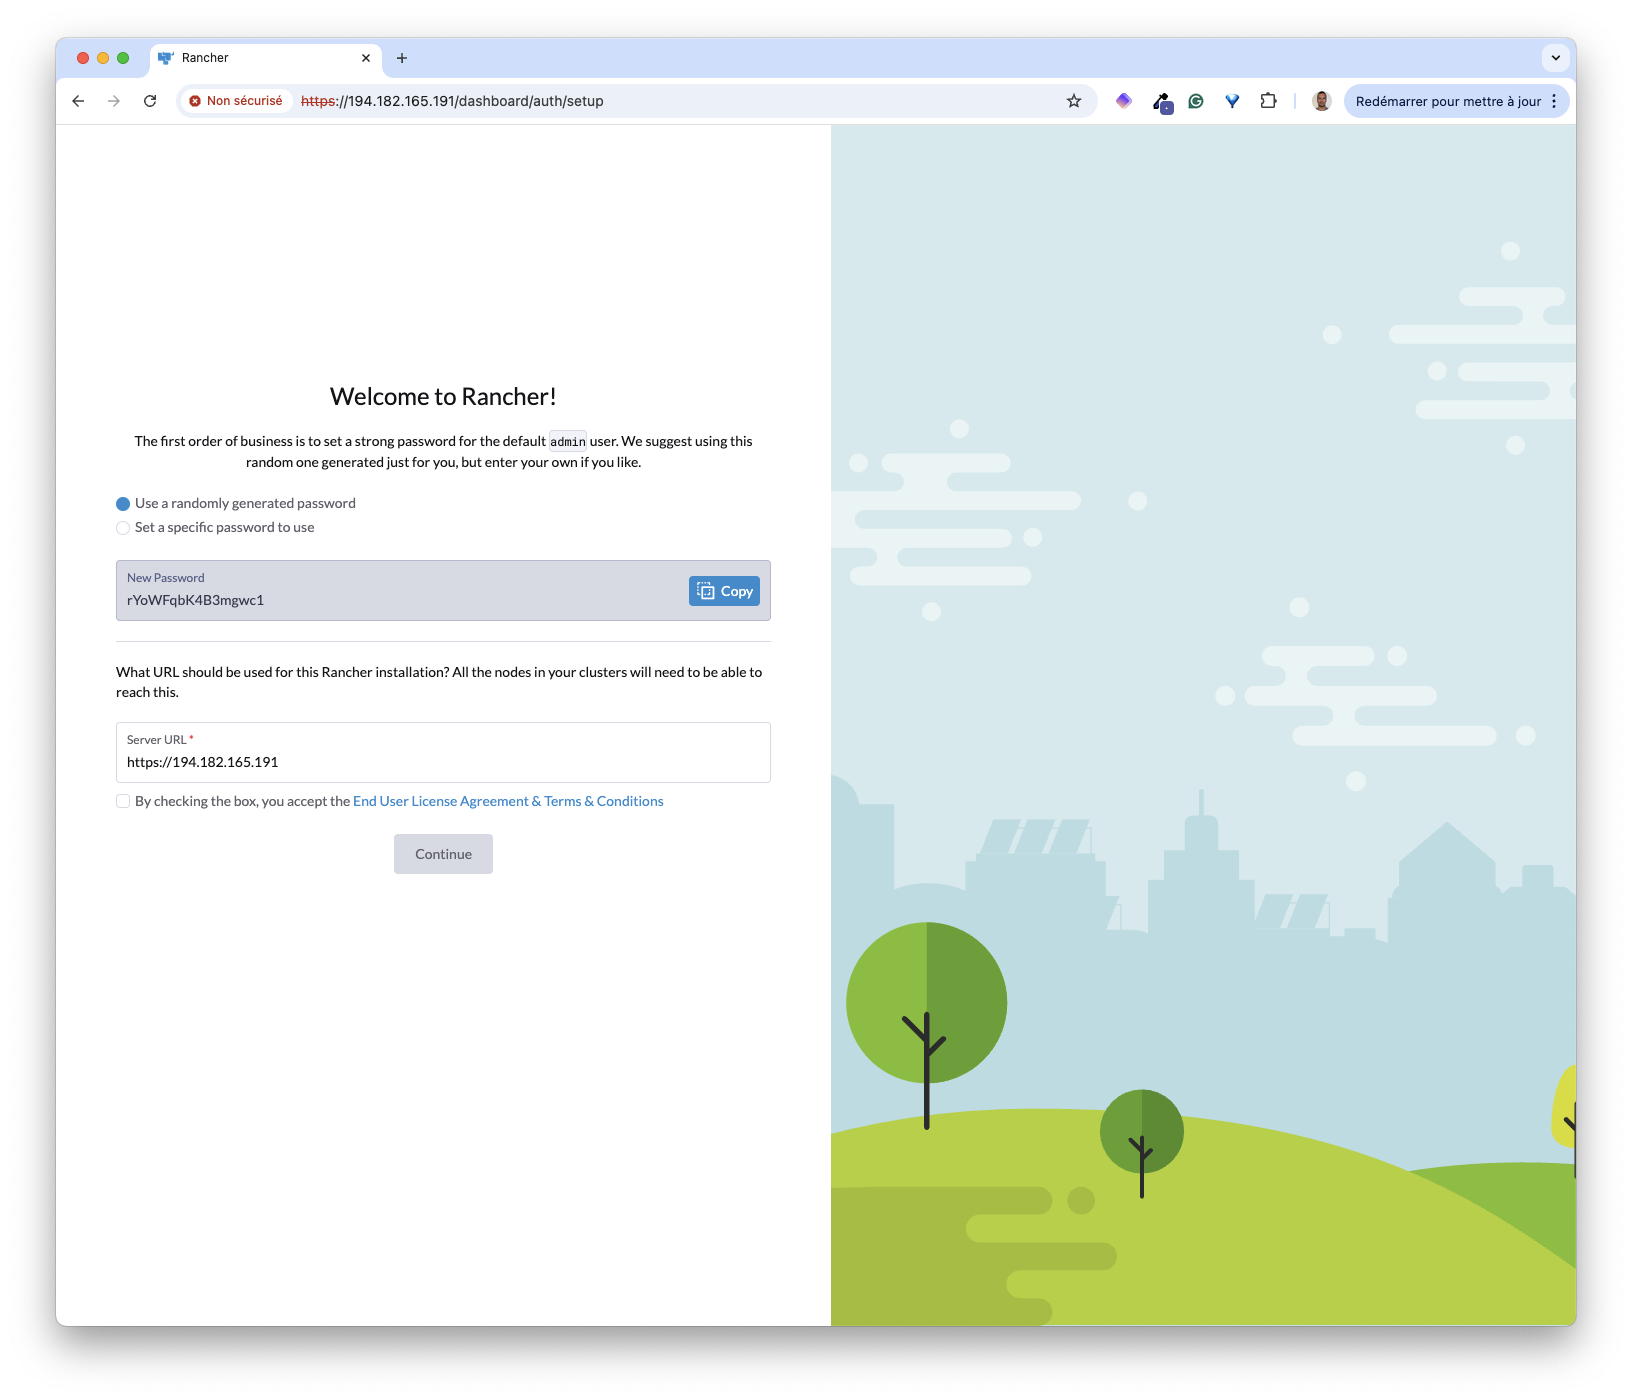
2025/11/06 10:55:55 [INFO] Bootstrap Password: j4s9bqblx2rrl4xkfcgnh8q48dqm5mcvdxmcbn8zb5hxqpskd7glpmWe use this password to log in for the first time. Then, we get a new password.
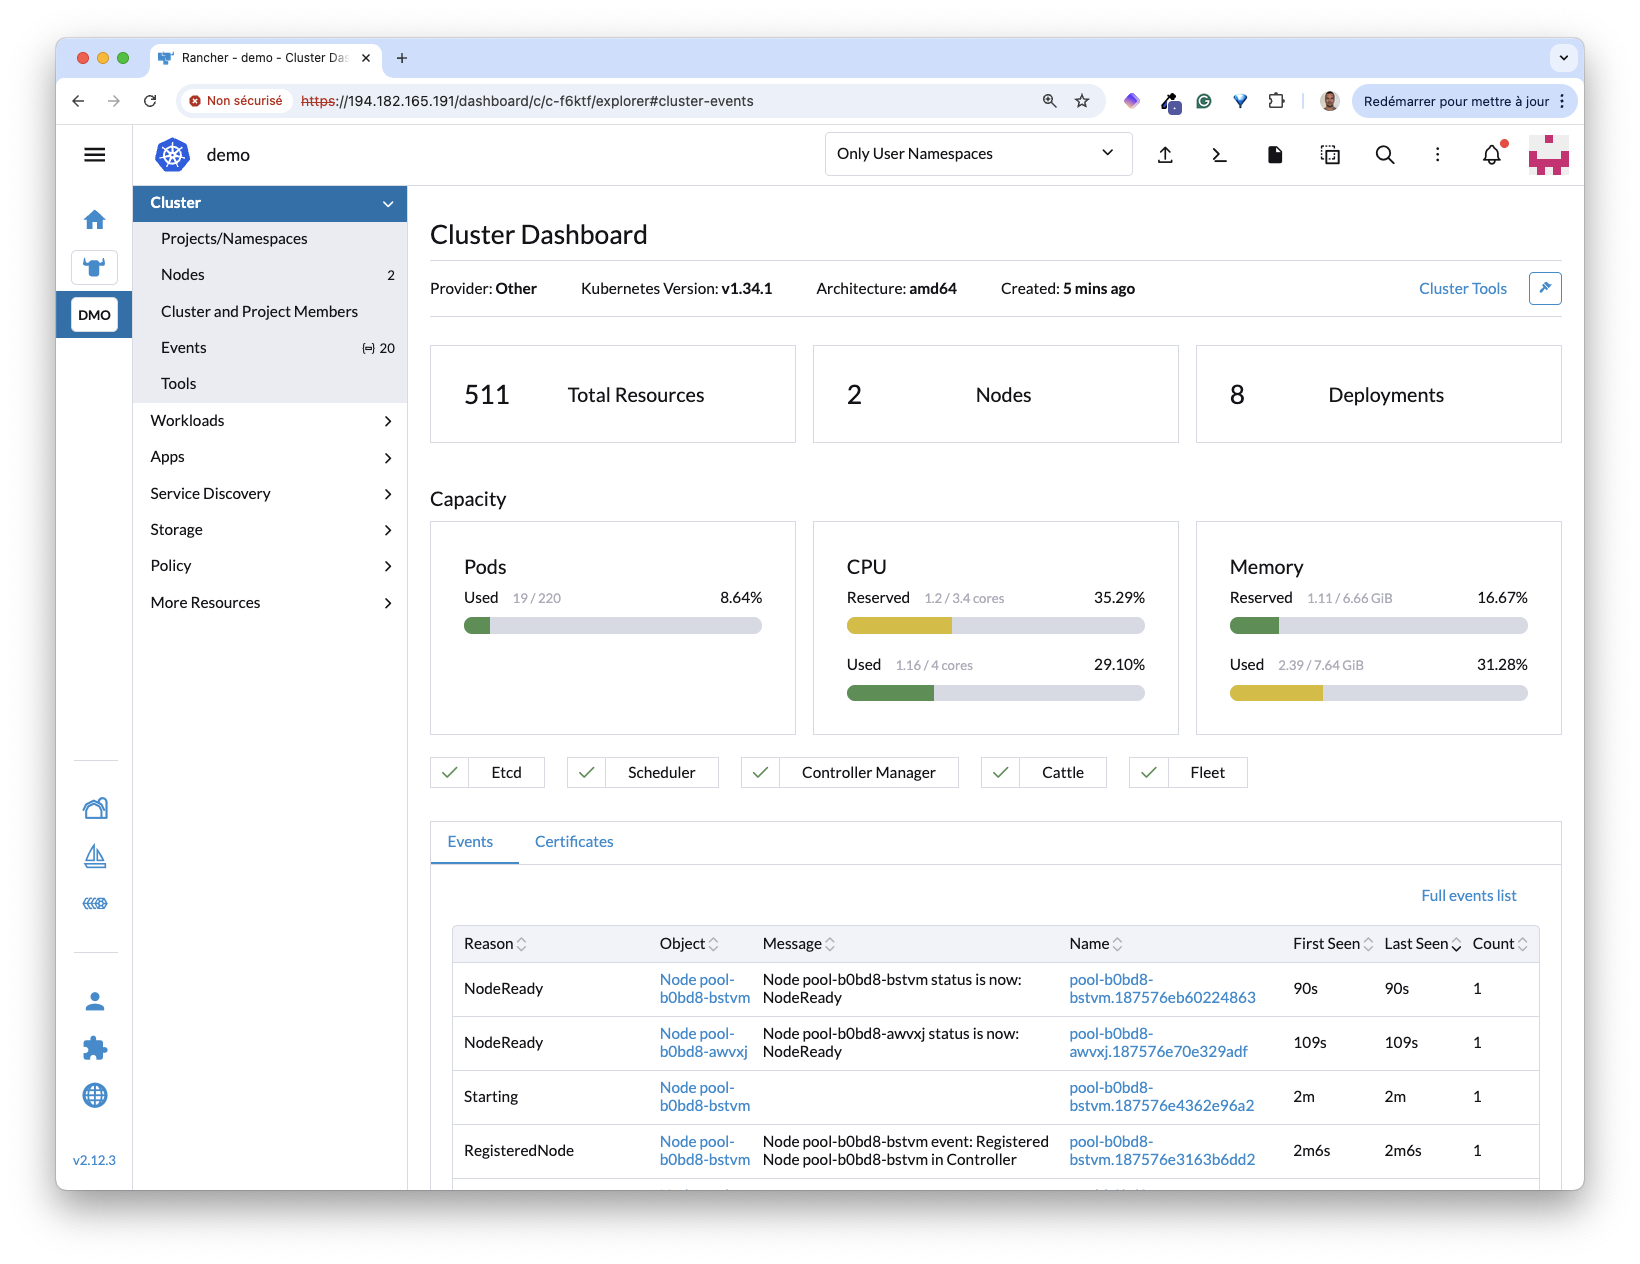
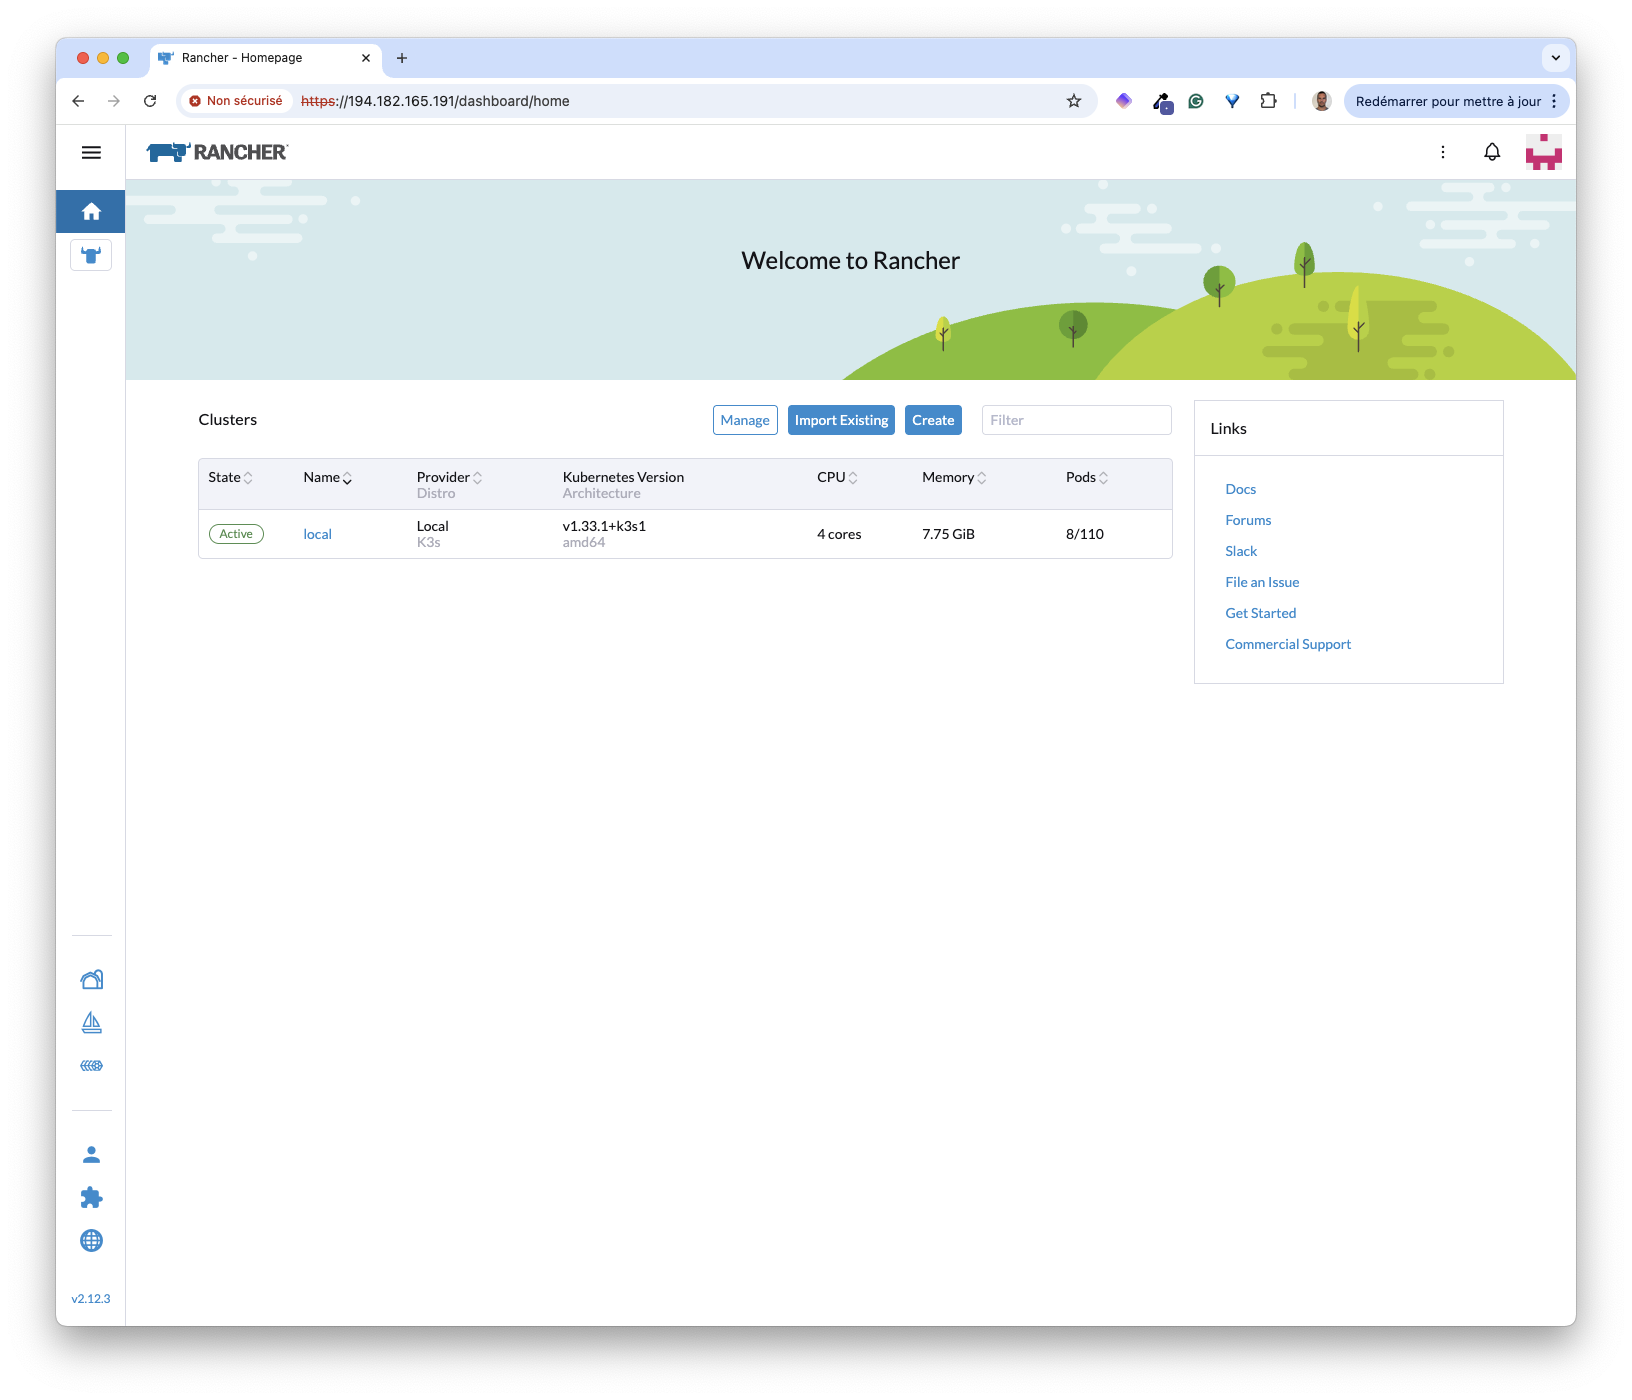
We can then access the dashboard. This one shows only a local k3s cluster installed on the instance we created.
In the next section, we’ll go through the process of managing an SKS cluster with Rancher.
Adding Exoscale cluster driver
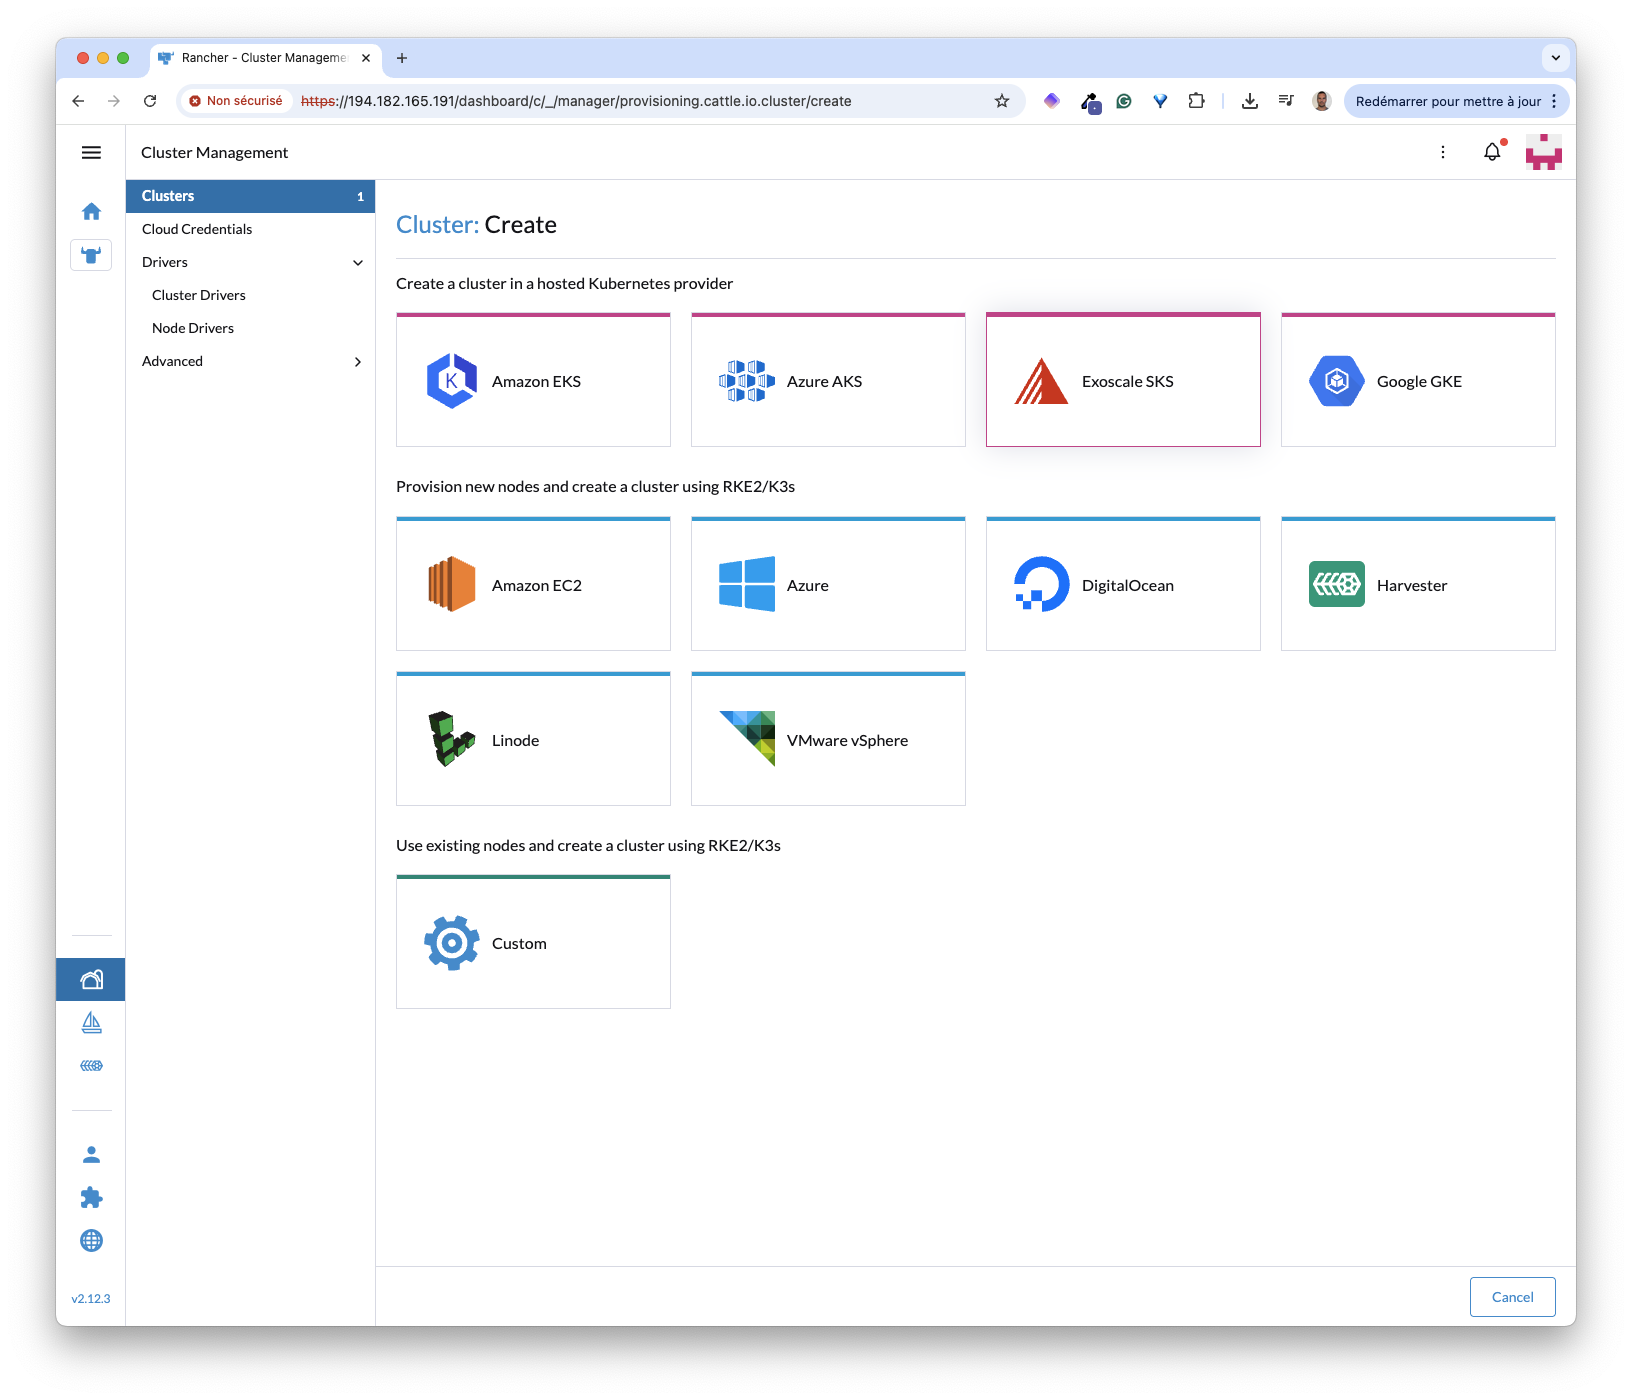
By default, if we click the Create button, we can only create a hosted cluster in AWS, Azure, or Google.
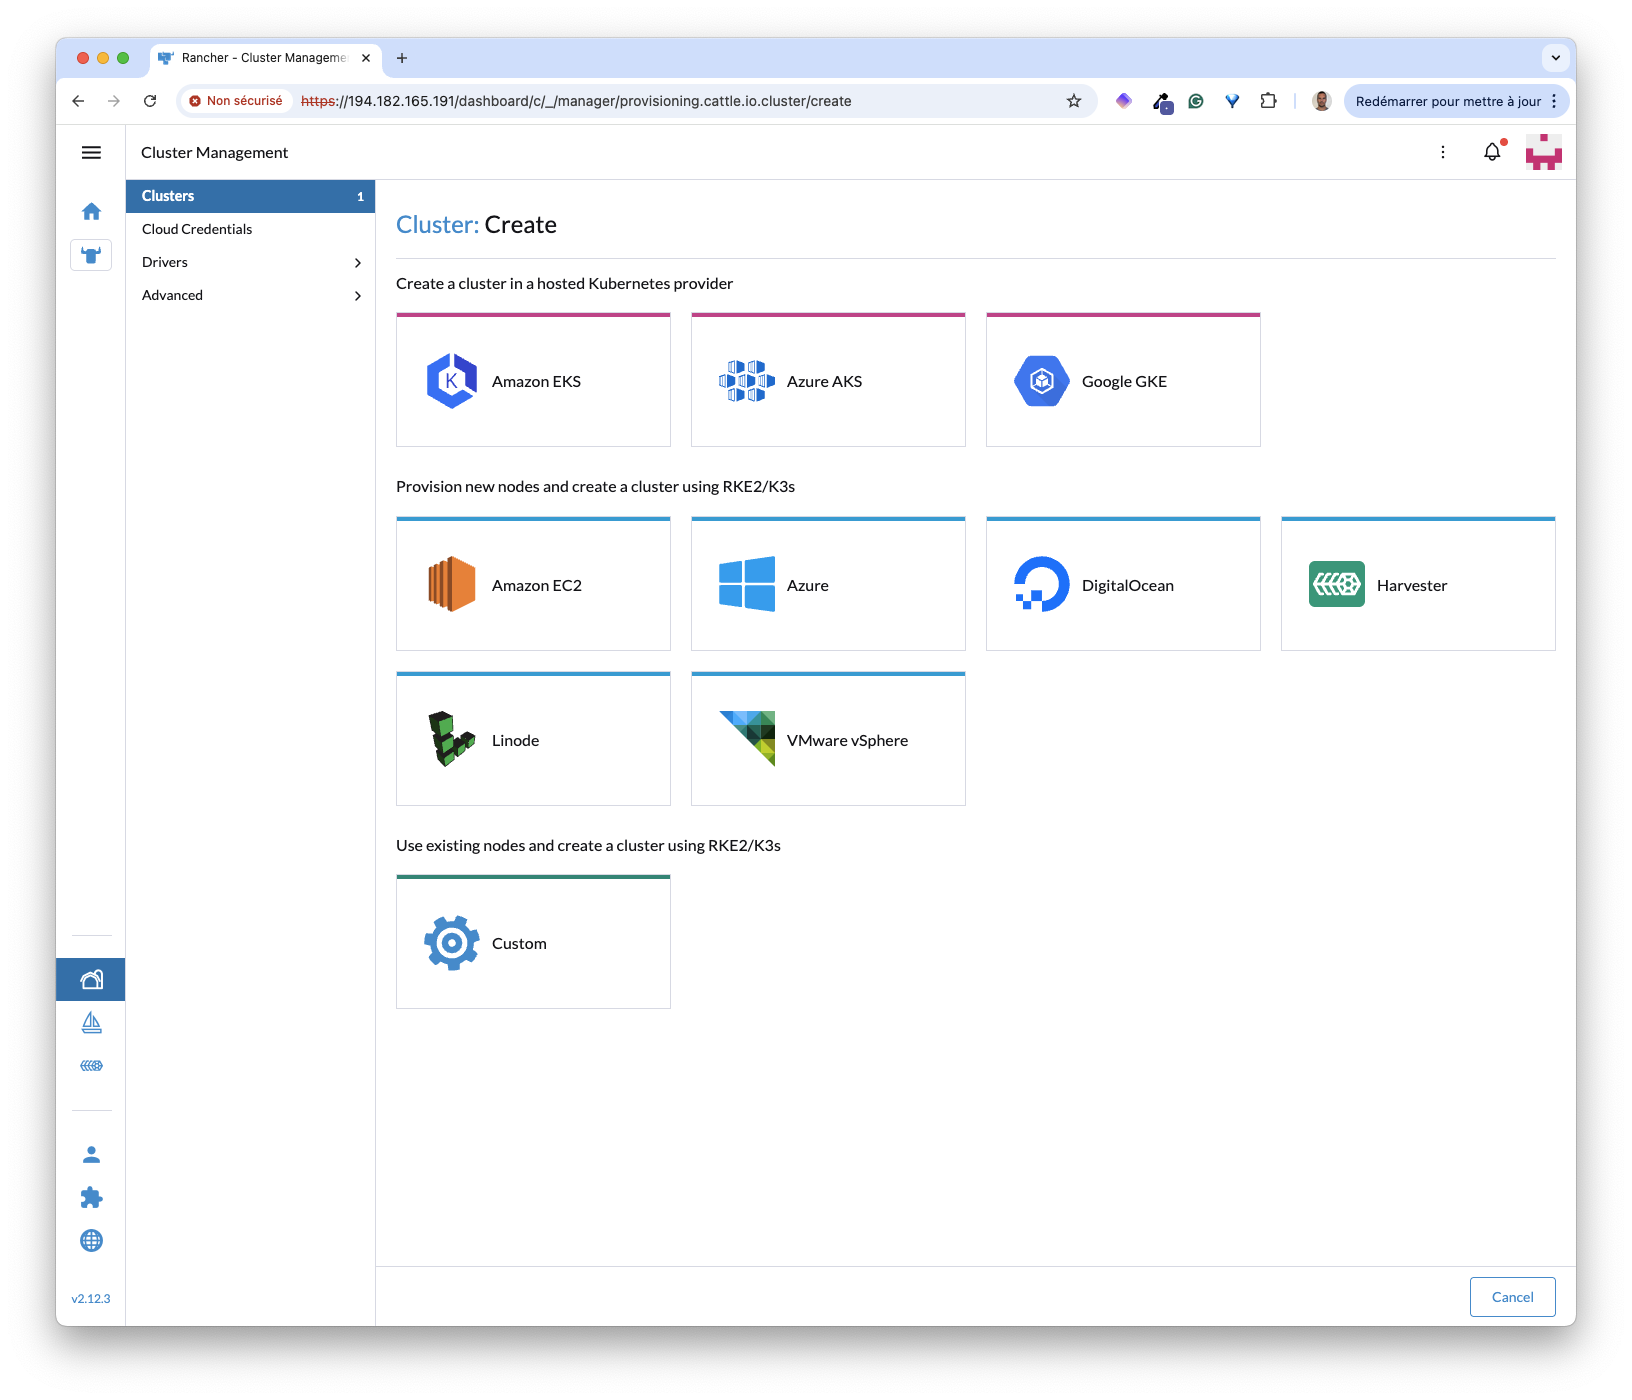
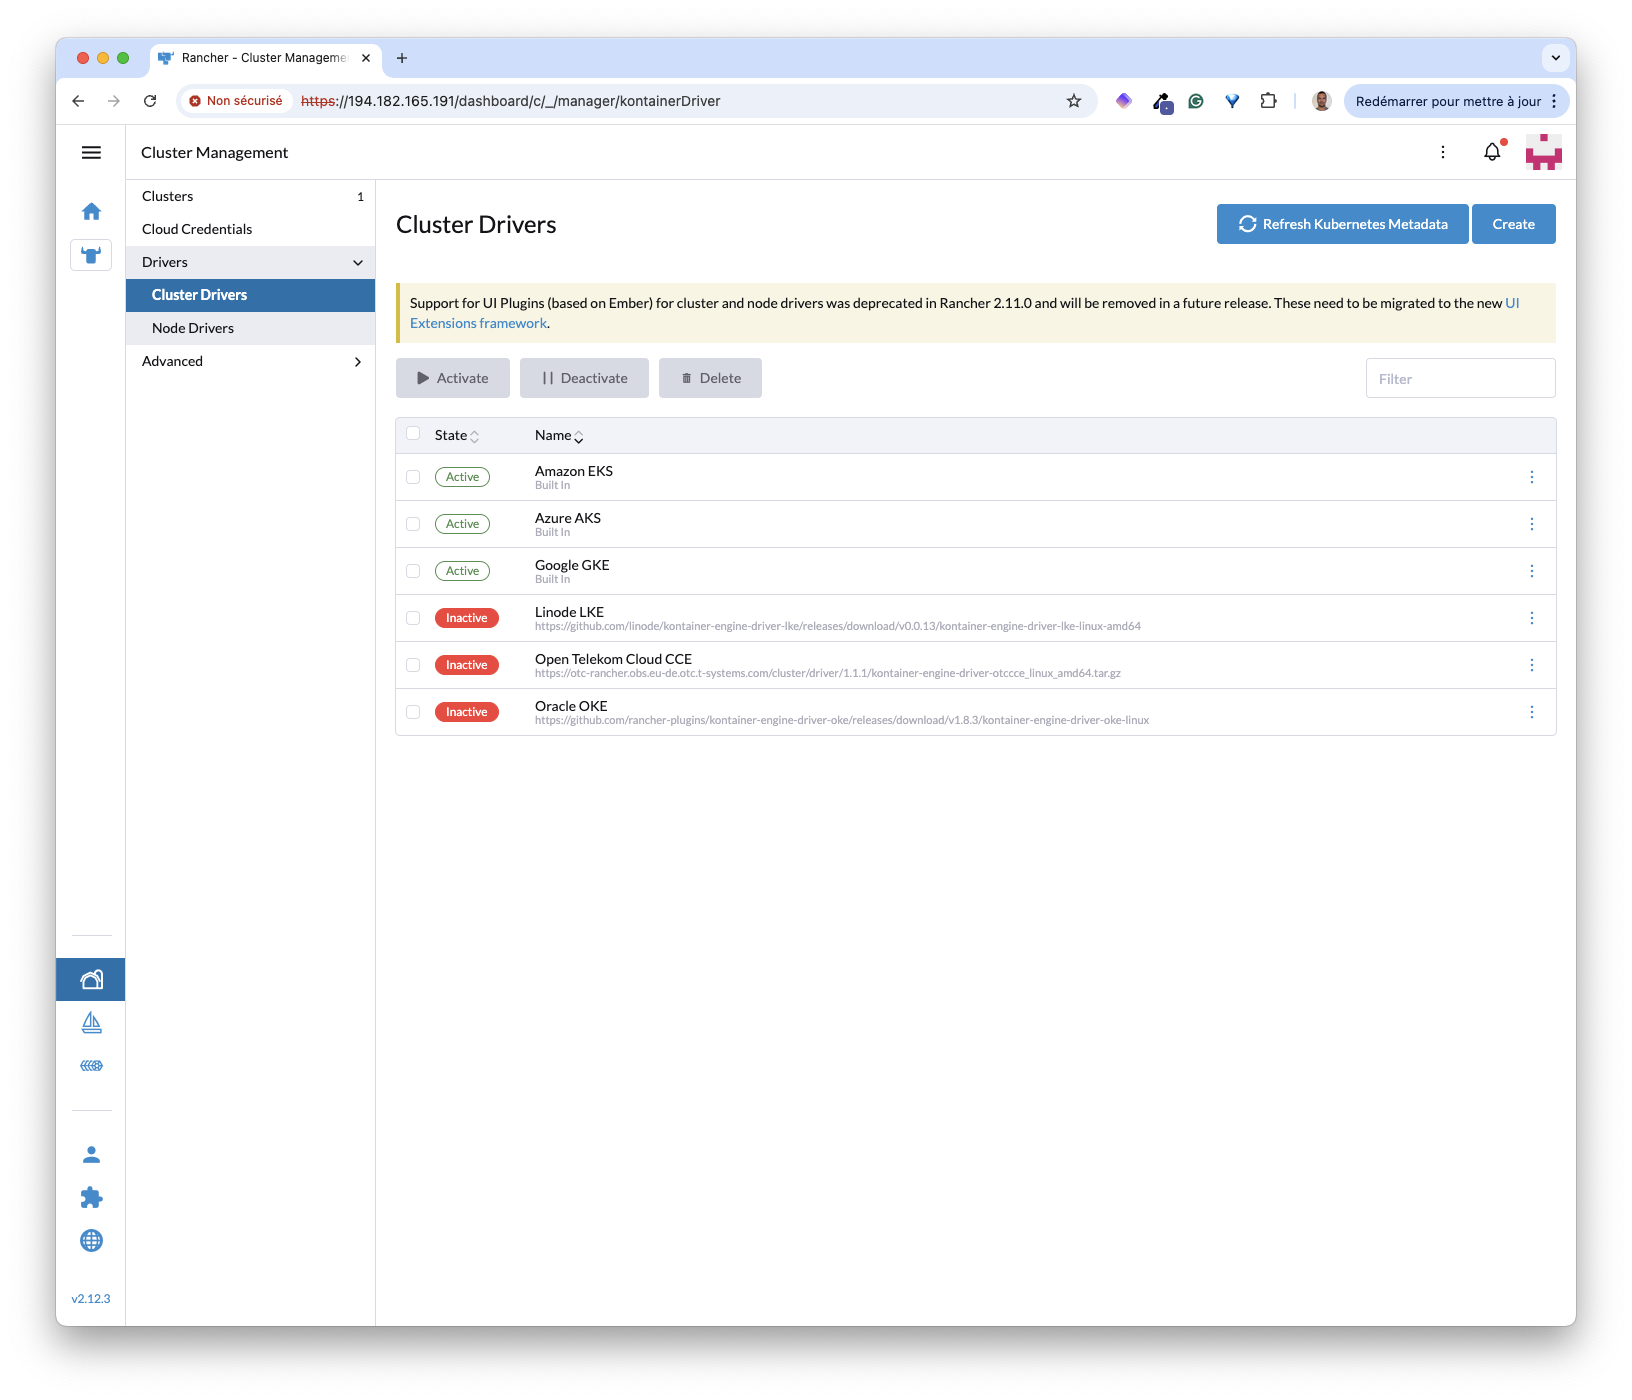
Rancher lets you enable other providers via the “Drivers” -> “Cluster Drivers” menu.
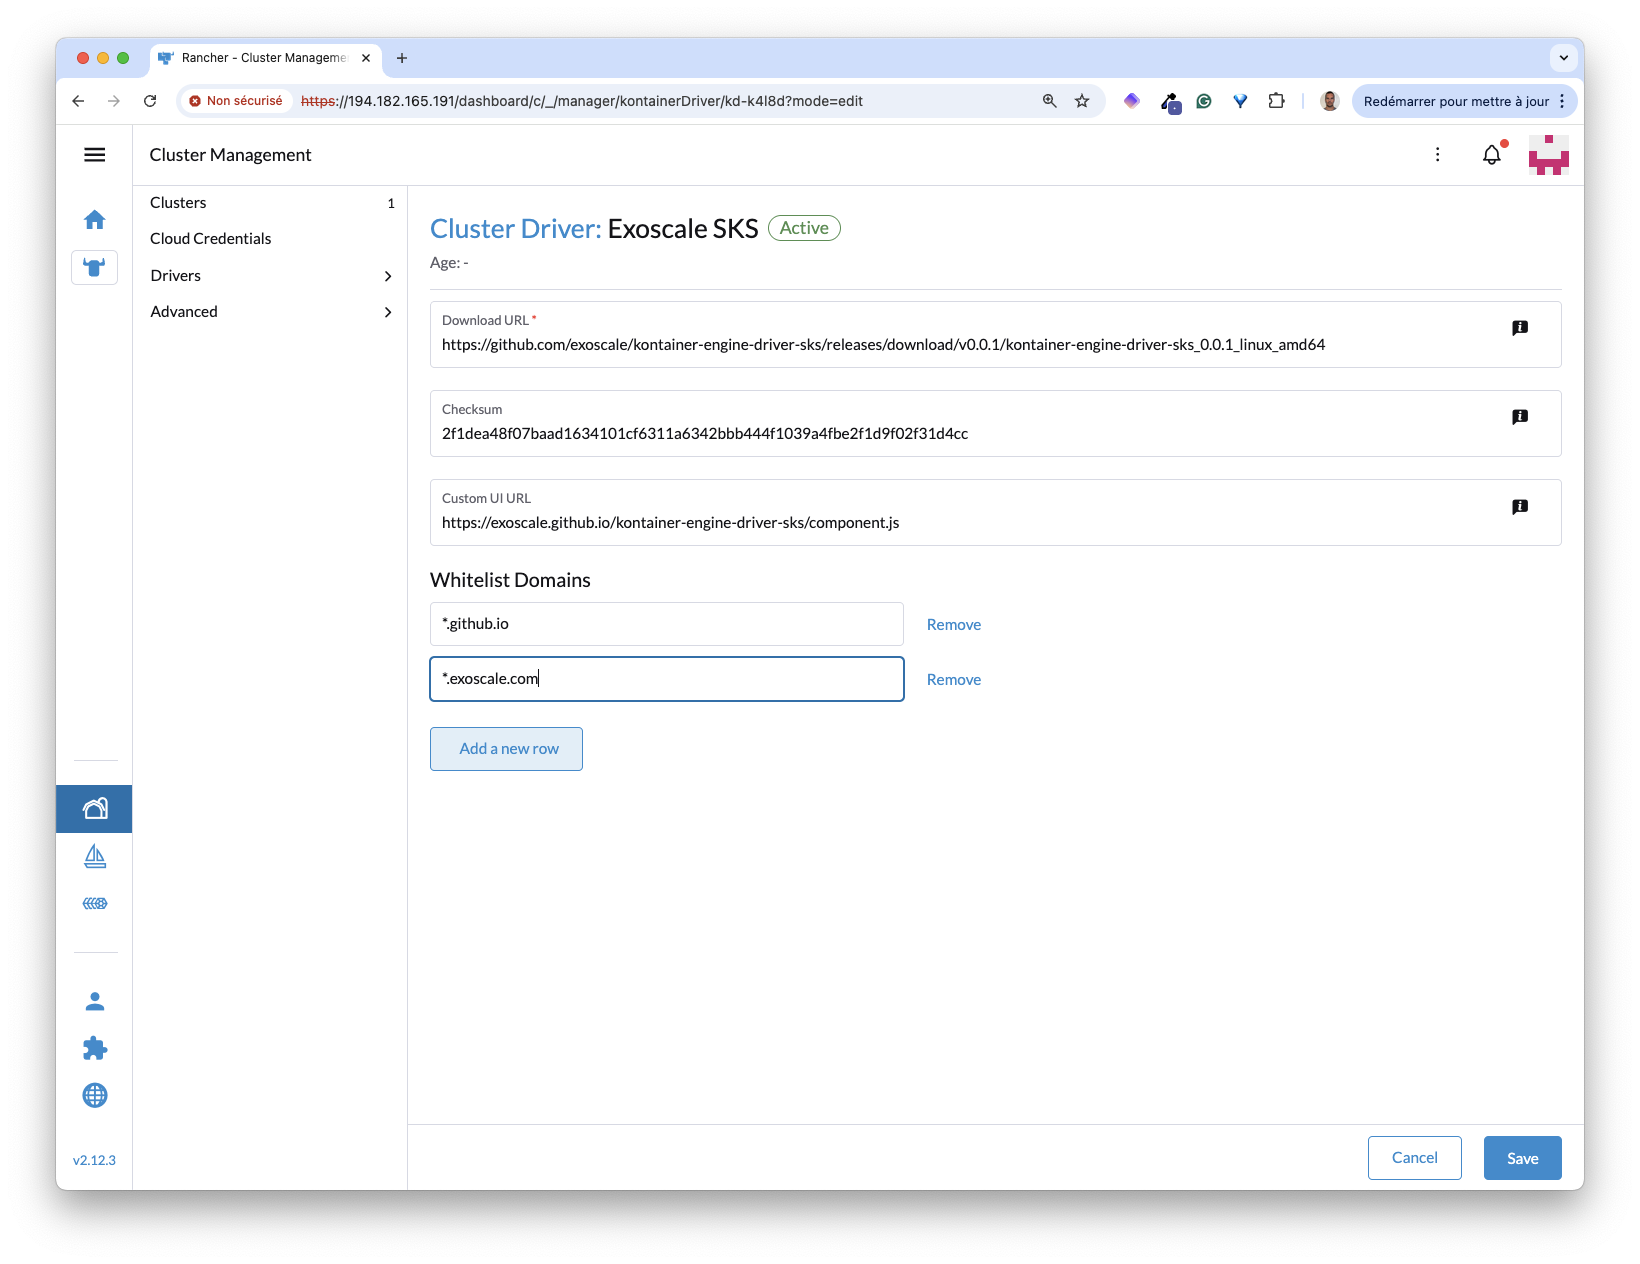
Rancher also allows you to add other providers via a cluster driver. To add the Exoscale cluster driver, we first click the Create button and enter the following information:
- Download URL: https://github.com/exoscale/kontainer-engine-driver-sks/releases/download/v0.0.1/kontainer-engine-driver-sks_0.0.1_linux_amd64
- Checksum: 2f1dea48f07baad1634101cf6311a6342bbb444f1039a4fbe2f1d9f02f31d4cc (from this file)
- Custom UI URL: https://exoscale.github.io/kontainer-engine-driver-sks/component.js
- whitelist domains:
*.github.ioand*.exoscale.com
It only takes a few seconds for the new driver to be activated.
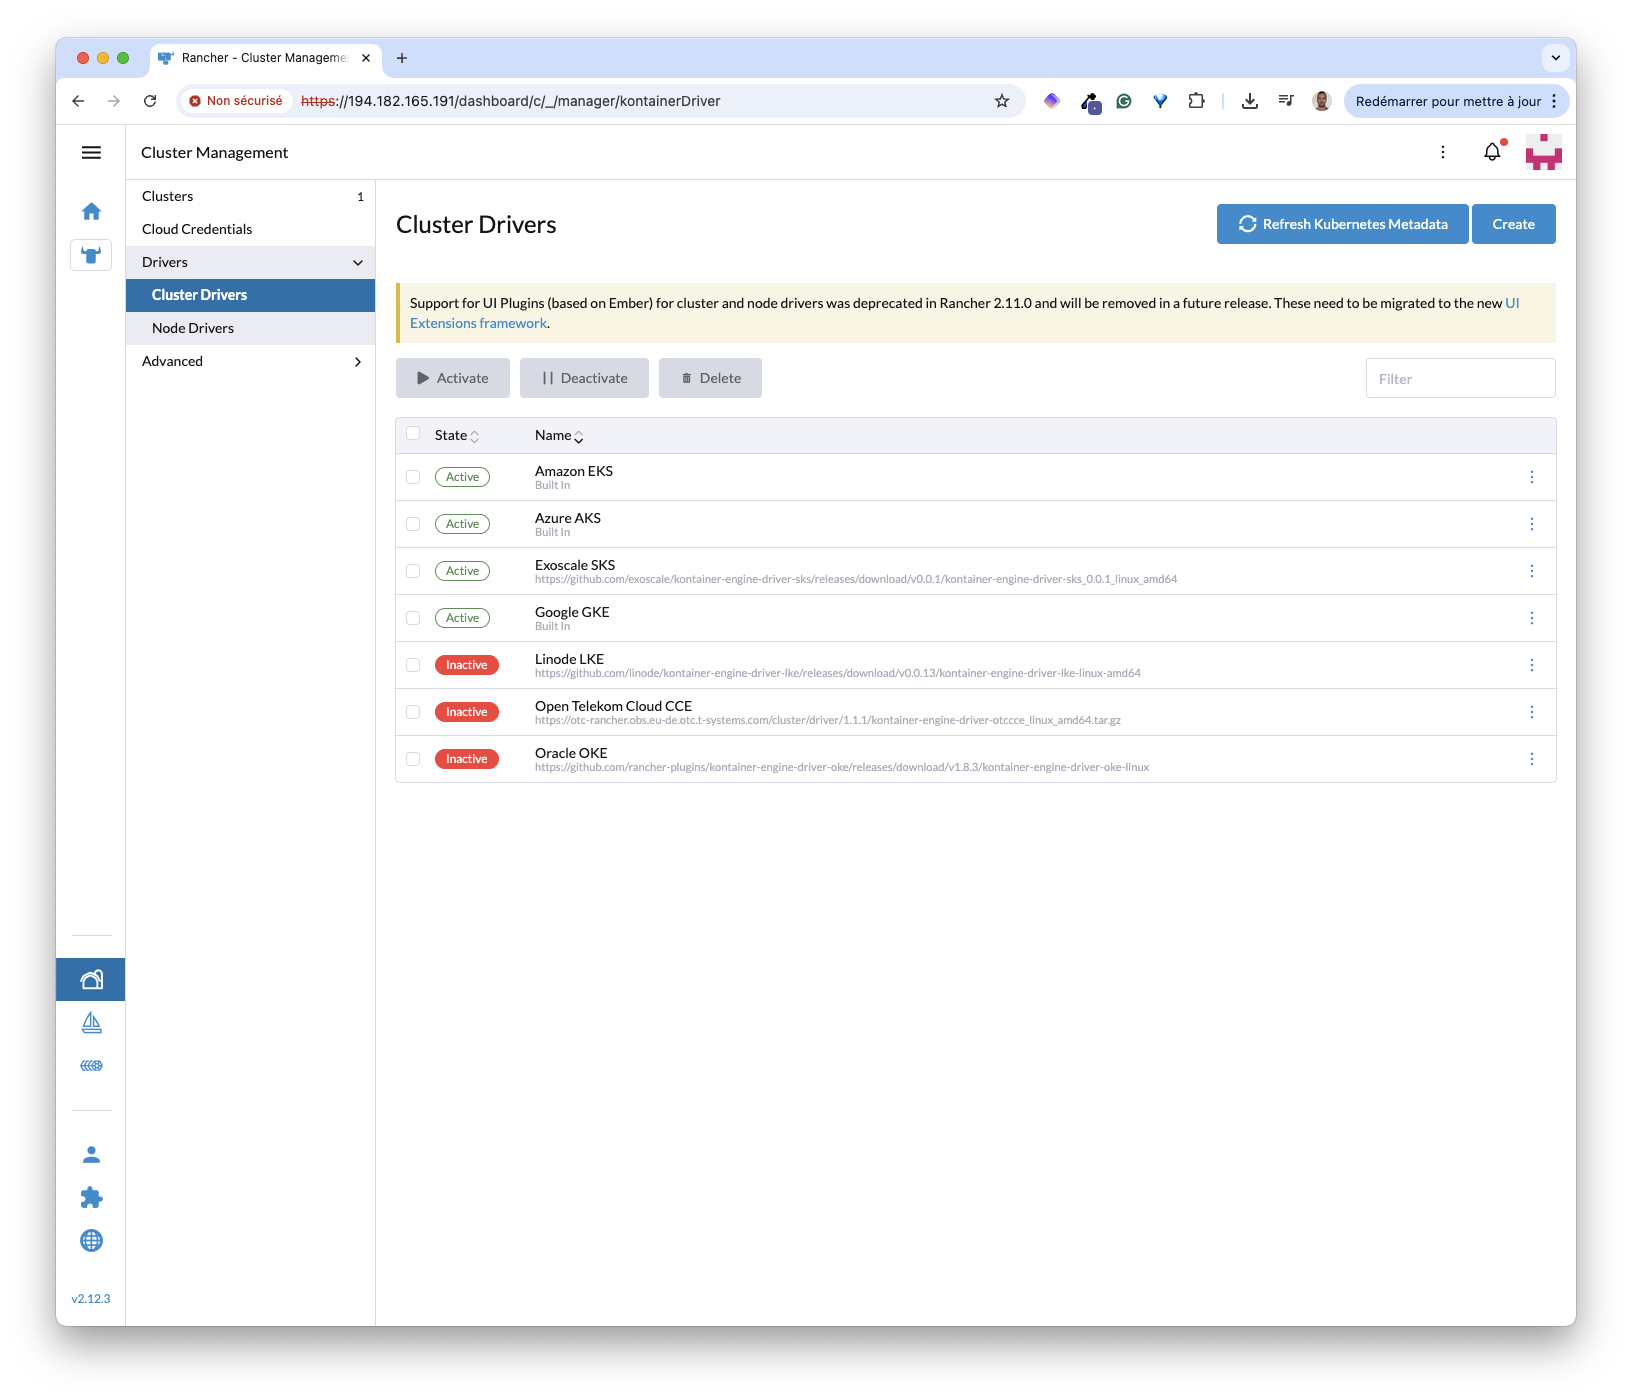
On the cluster creation page, we can now create an Exoscale-managed cluster.
Clicking the Exoscale SKS button launches the cluster creation assistant. First, we need to provide the cluster’s name and an Exoscale key pair (ACCESS_KEY, SECRET_ACCESS_KEY) so Rancher can communicate with the Exoscale API.
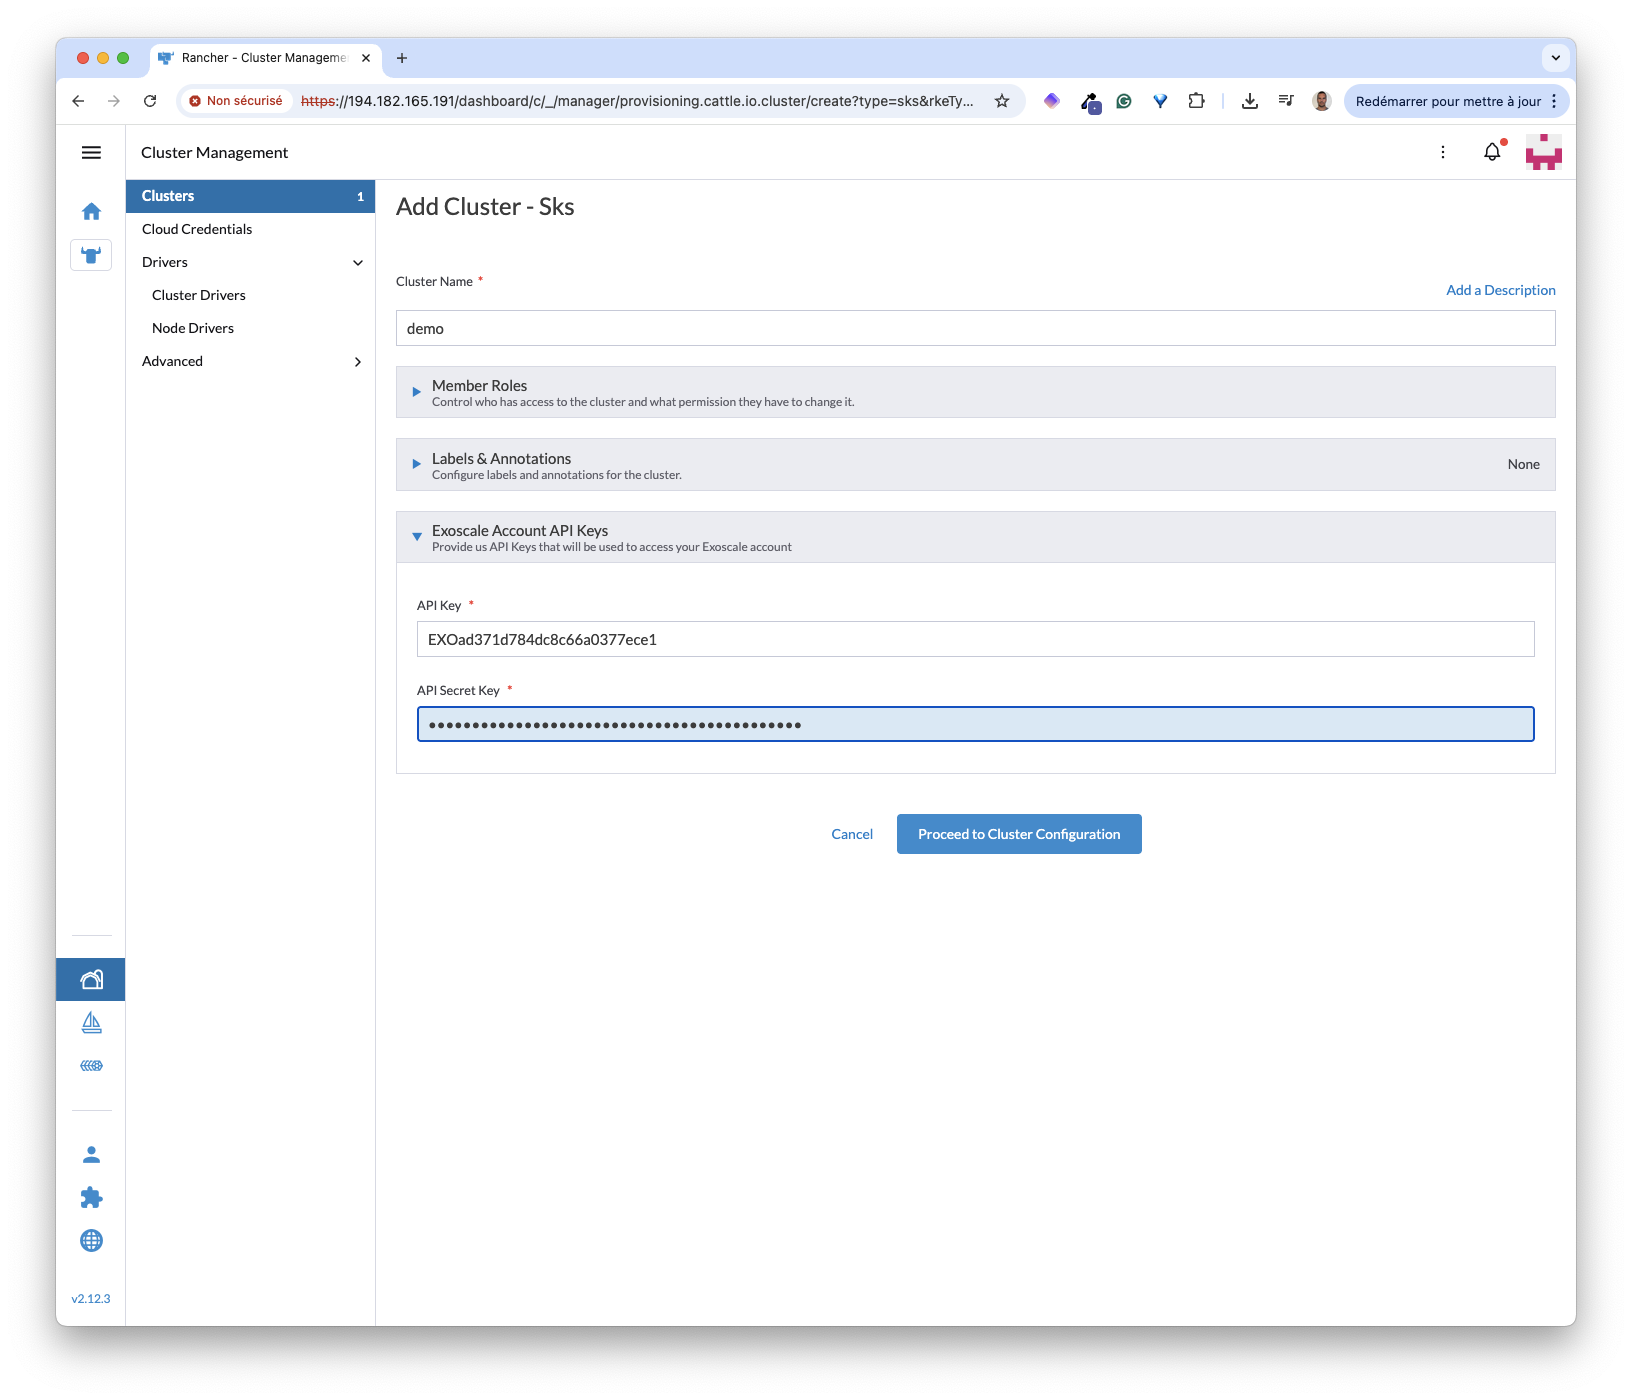
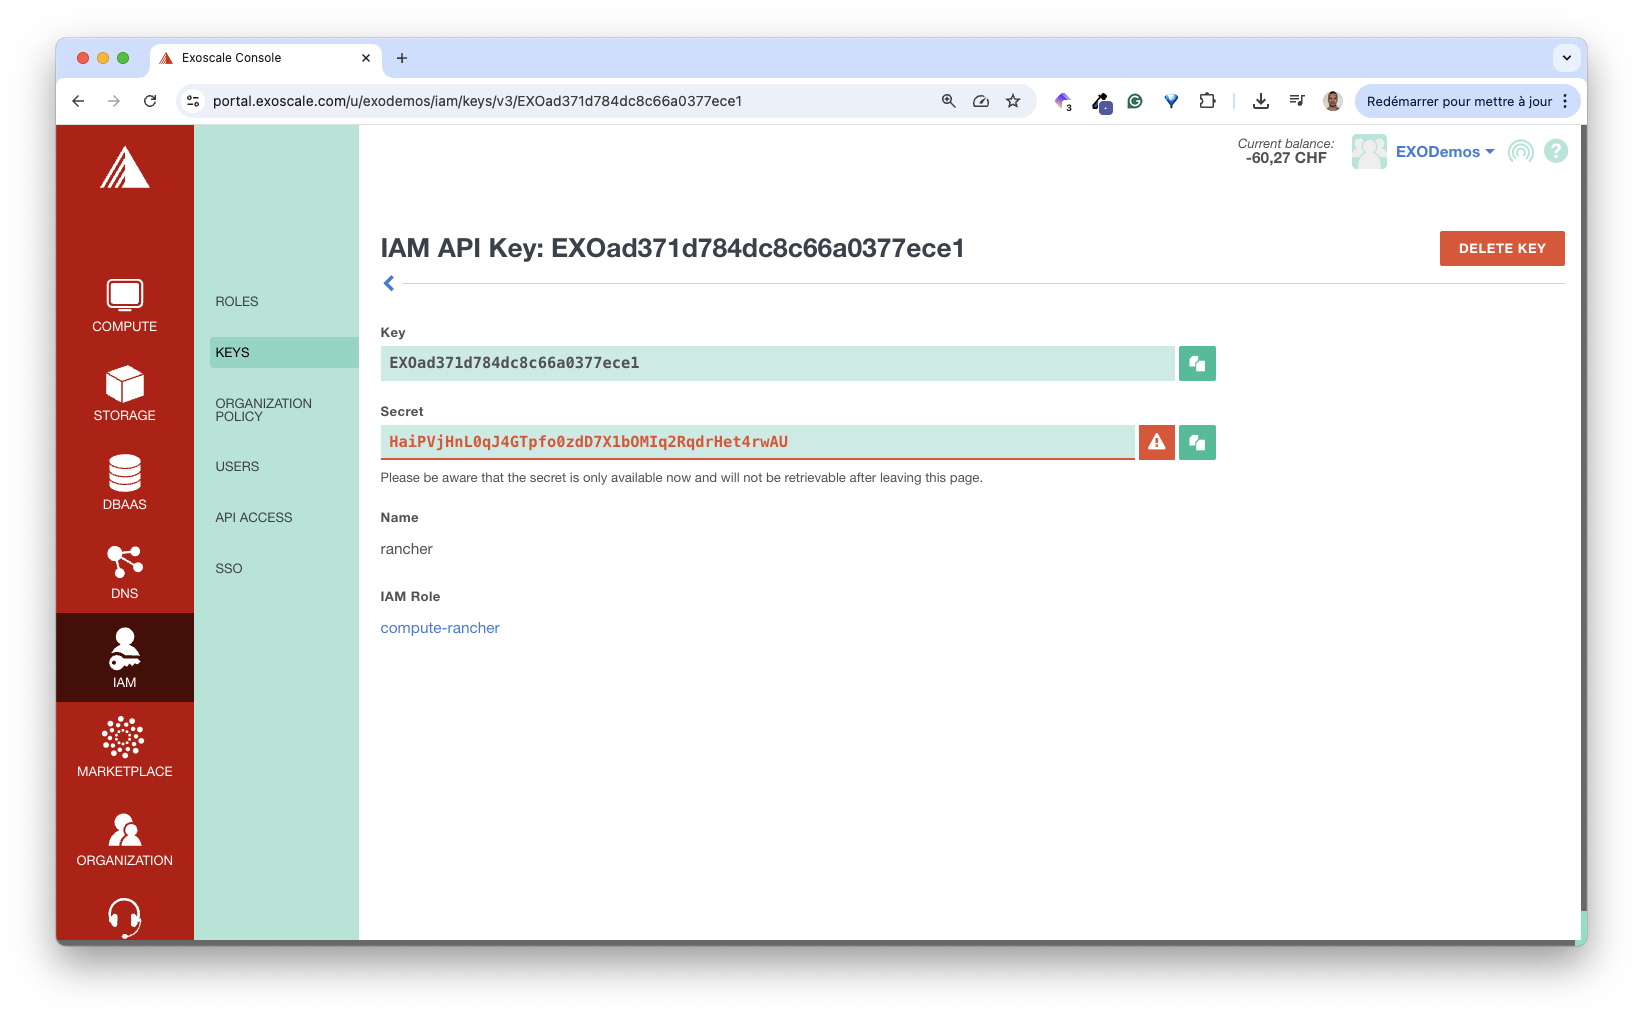
If you need to create a key pair, please follow the details below.
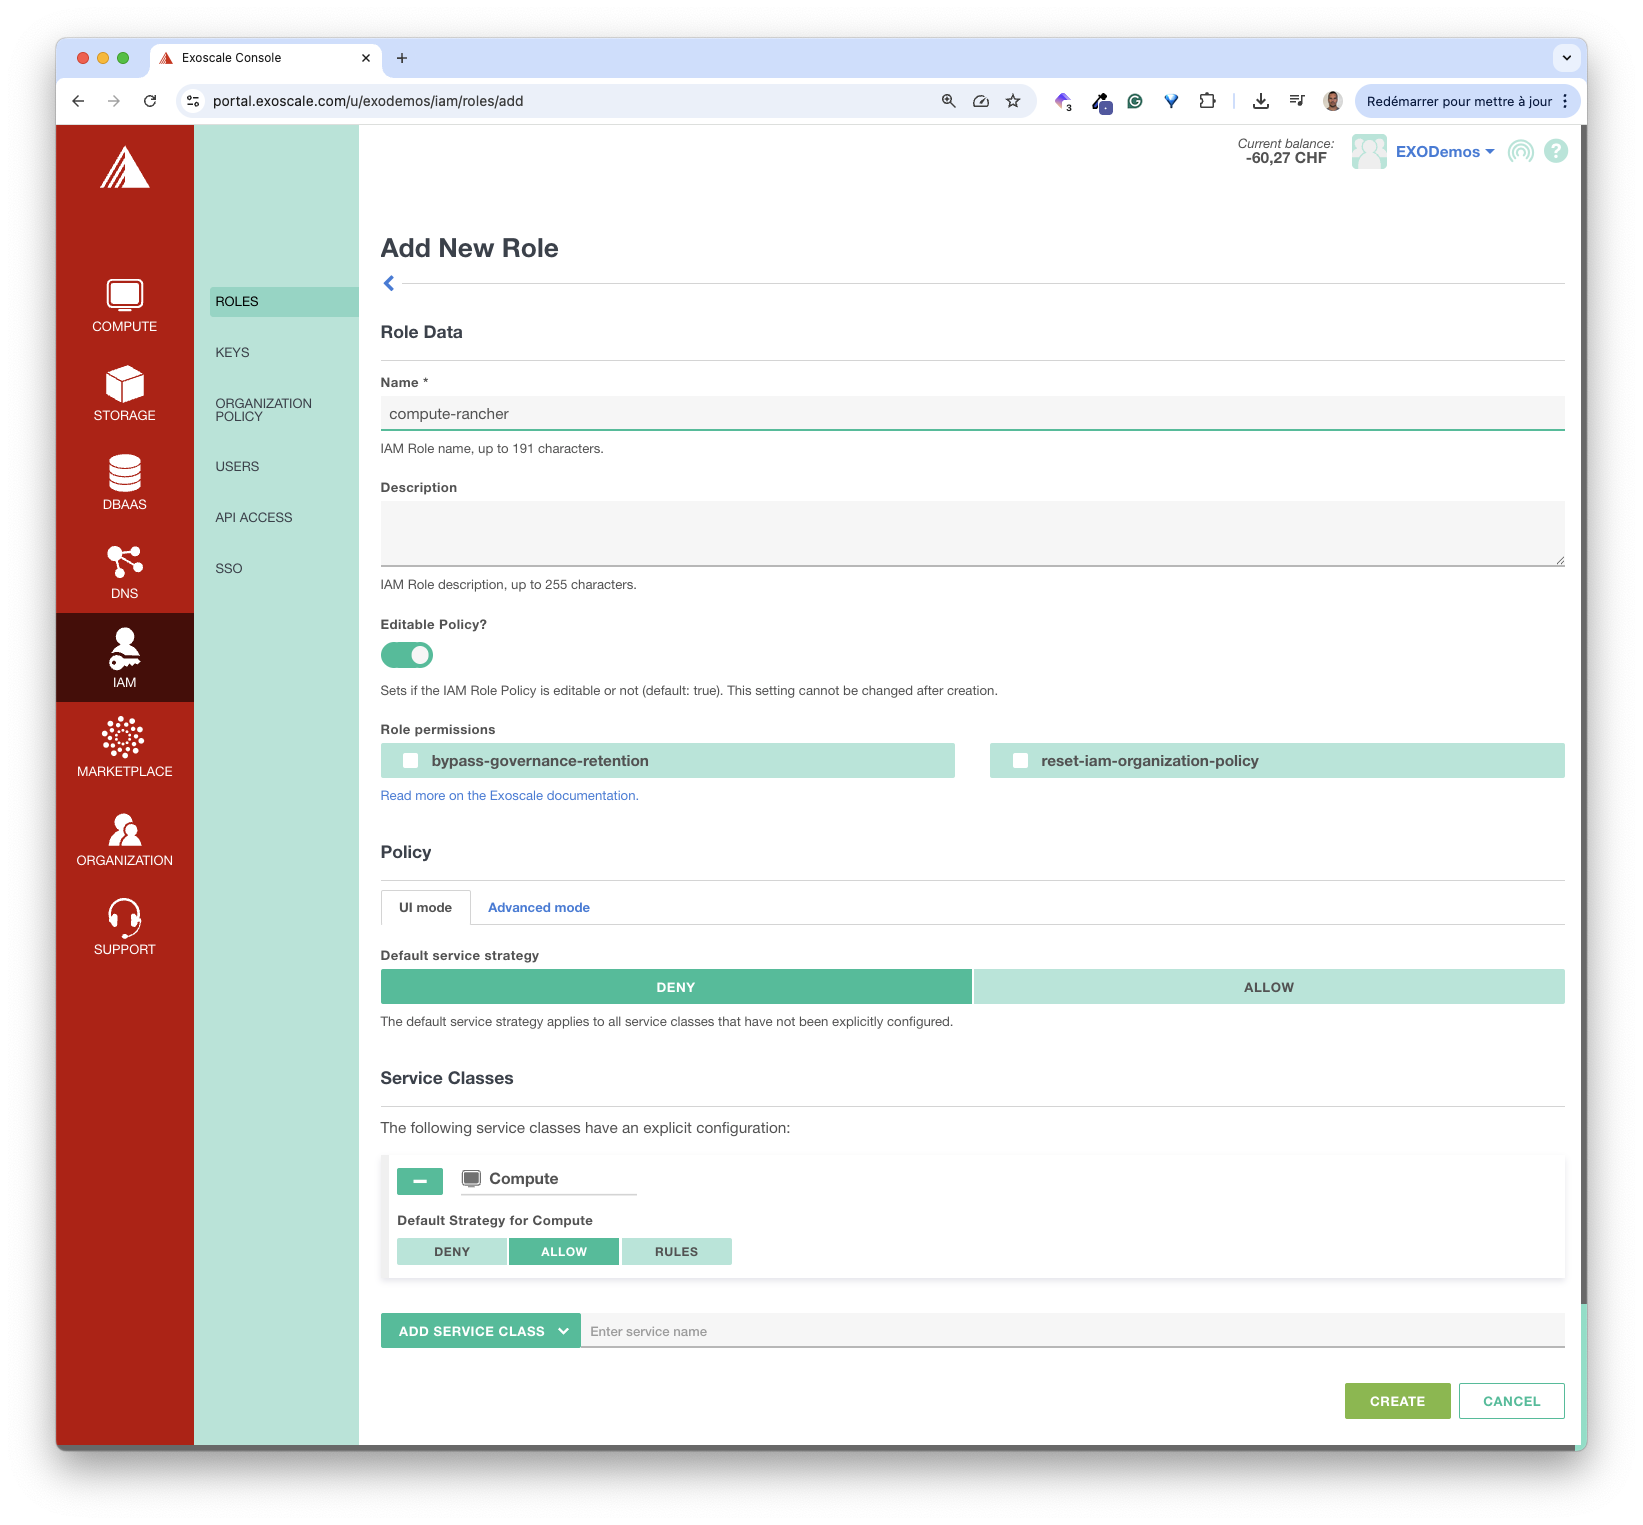
creating an Exoscale key pair
First, go to the Exoscale portal and create a Role with access to the Compute Service Class from the IAM menu
Next, create a key for this role.
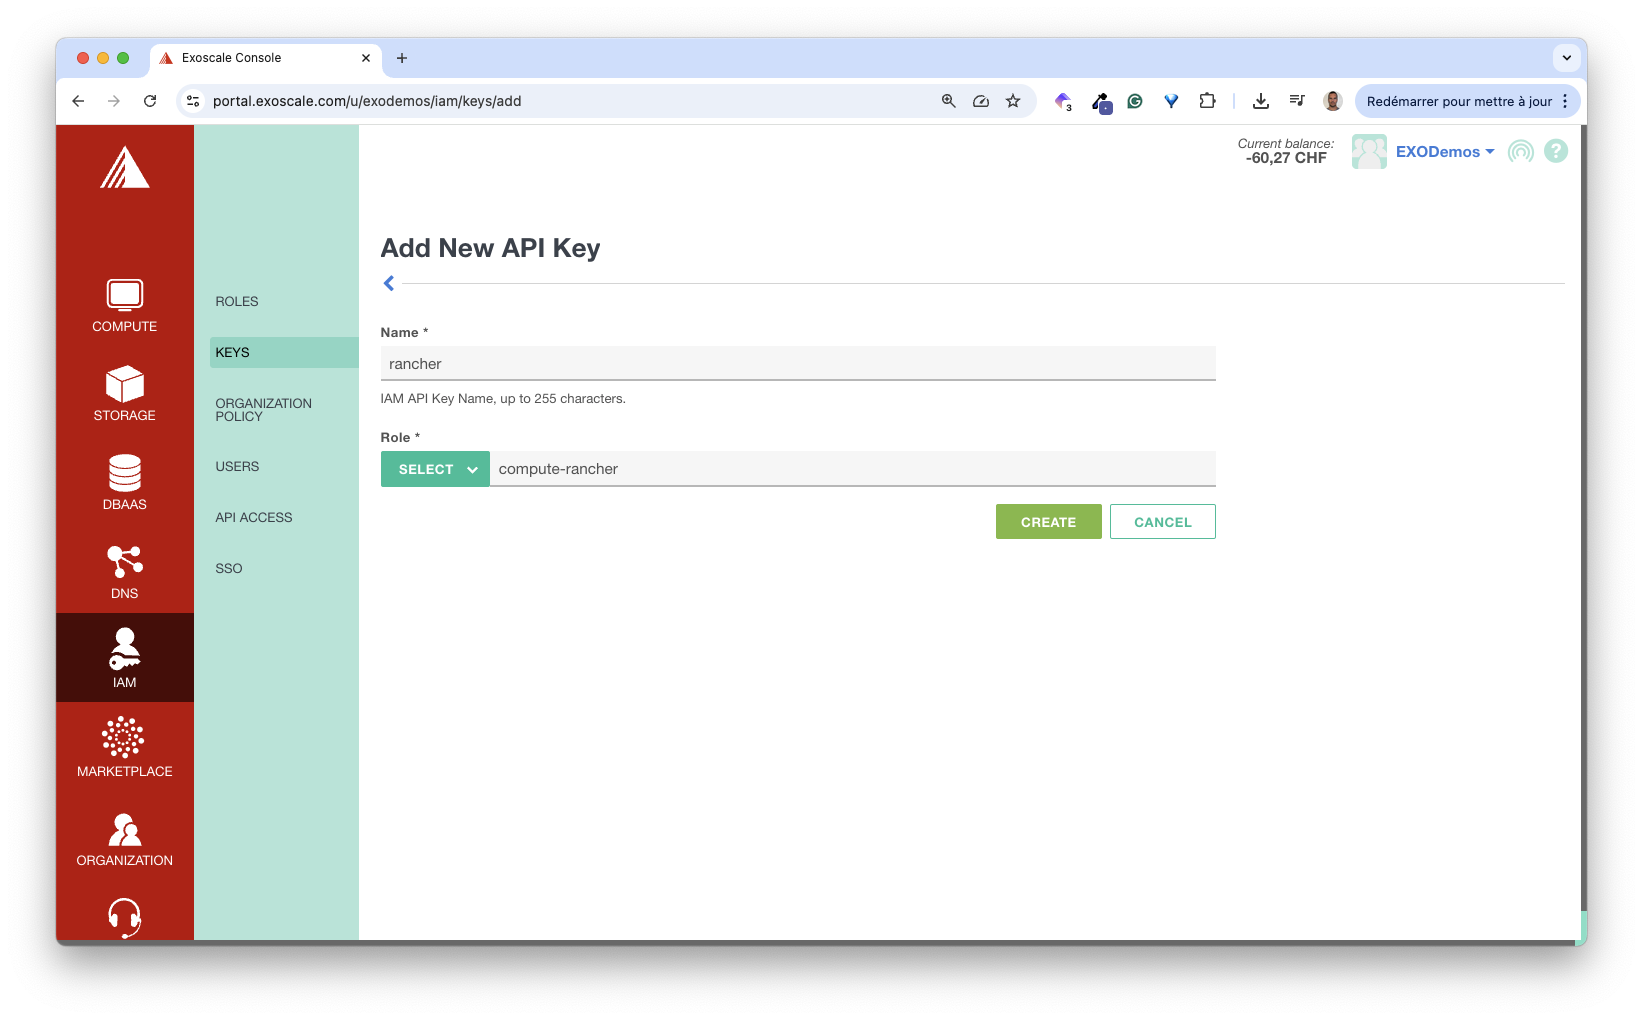
We then obtain the access key and secret key, which are ready for use.
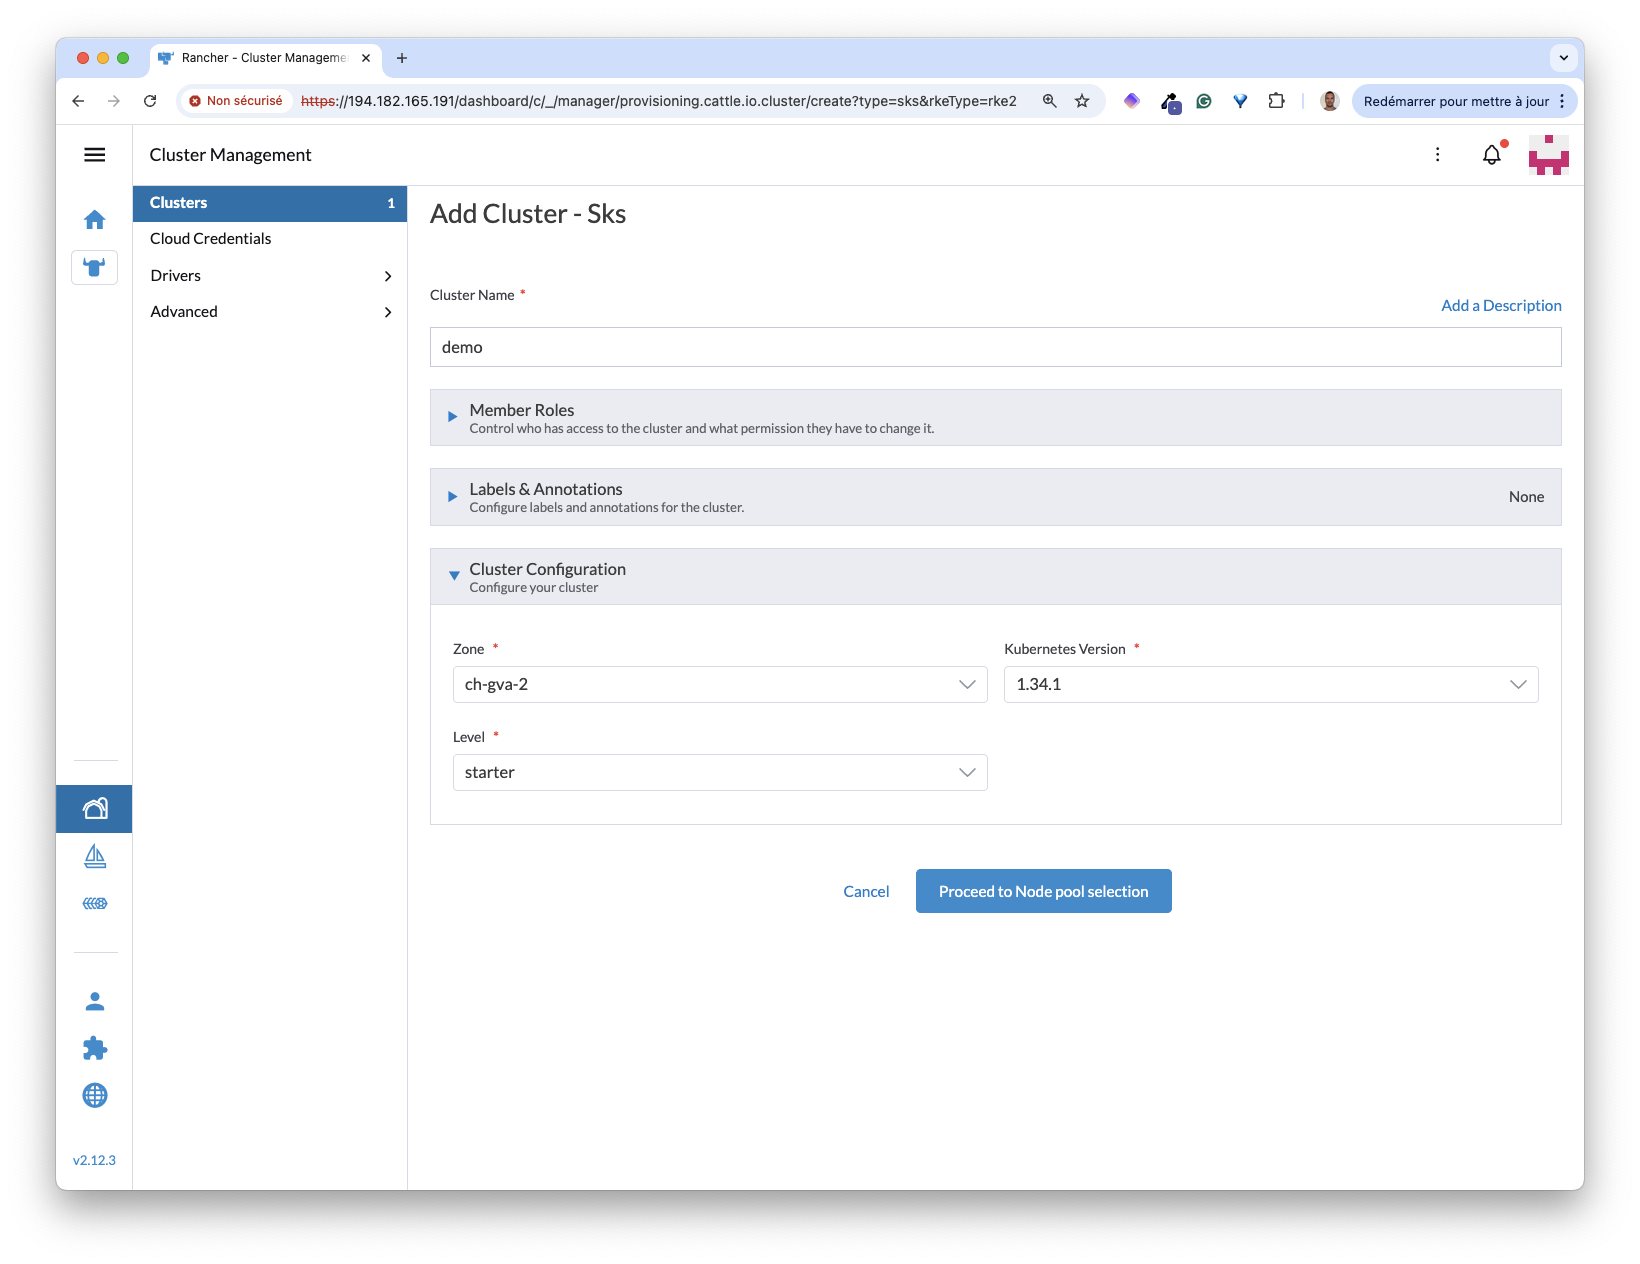
Next, we need to provide the following information:
- the zone to launch the cluster
- the Kubernetes version we need
- the control-plane level (
starterorpro)
Next, we need to specify the Node Pools to create for our cluster. In this example, we create a single Node Pool with 2 Medium instances.
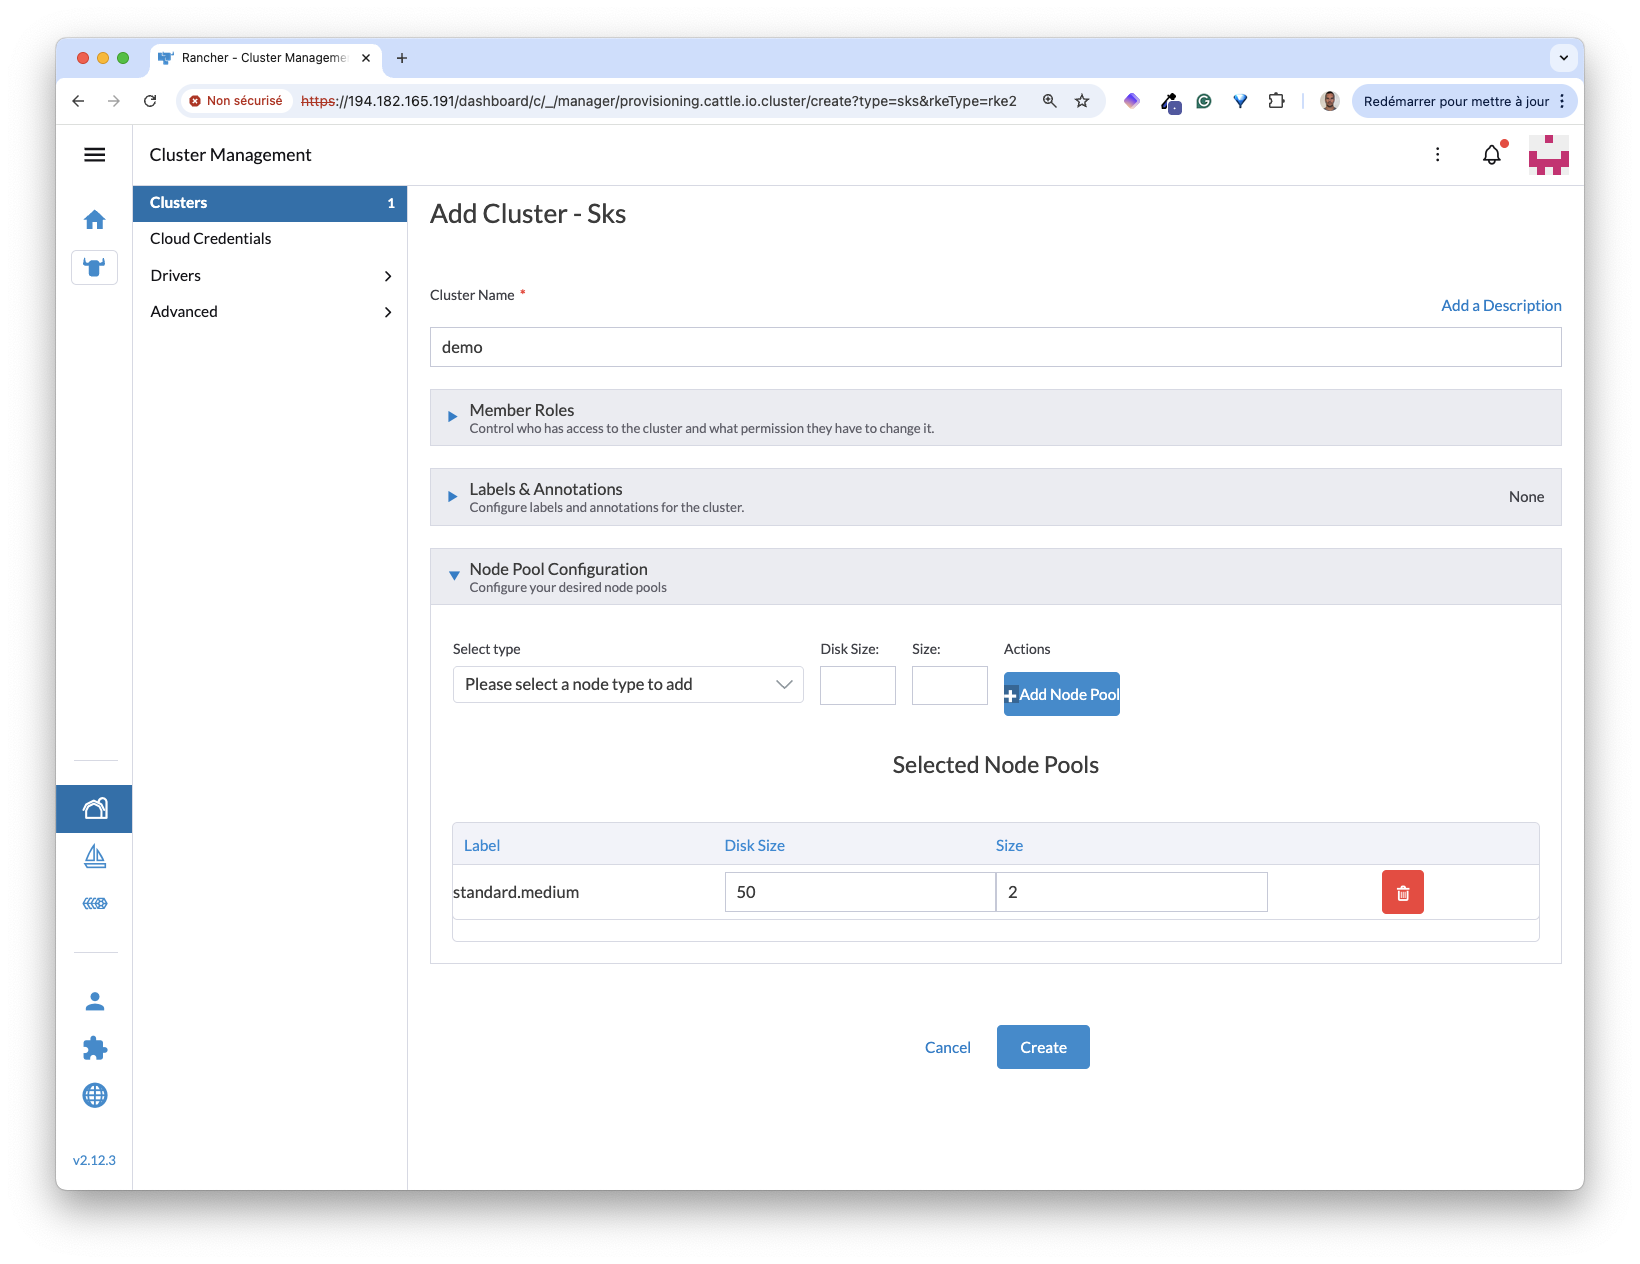
Then, it only takes a few minutes to have the cluster up and running and available in Rancher.
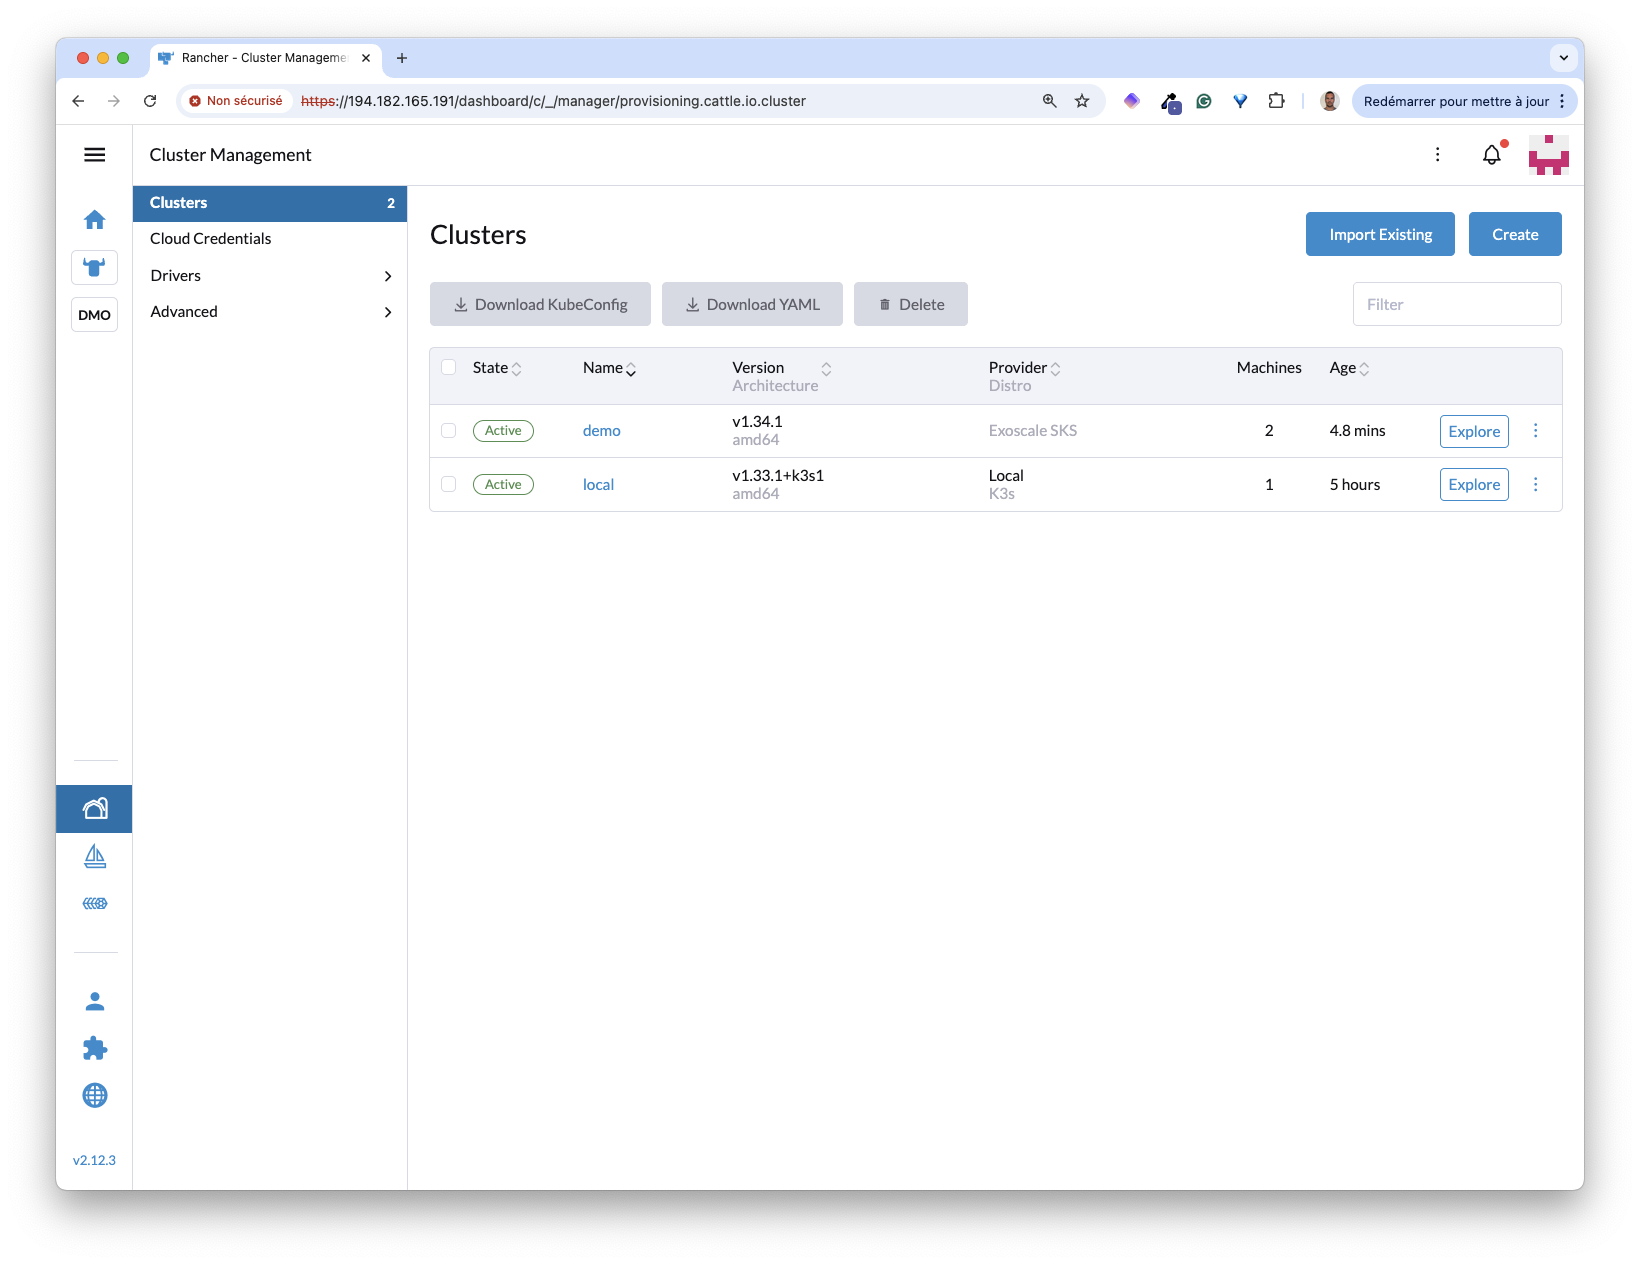
We can now manage our SKS cluster and deploy some applications using Rancher.