Quick Start - NLB
Use this guide to create a Network Load Balancer (NLB), connect it to an Instance Pool, and verify its public endpoint.
Prerequisites
Before you begin:
- Create an Instance Pool containing the instances that will receive traffic.
- Create the NLB and Instance Pool in the same Exoscale zone.
- Make sure the application is running on the target instances and listening on the target port.
- Configure the target instances’ Security Groups to allow the required application and health-check traffic.
- Install and configure the Exoscale CLI if you want to follow the CLI workflow.
Important
An NLB service targets an Instance Pool. You cannot configure an arbitrary list of instances as its backend.
First Steps via CLI
Create a Network Load Balancer
Create an NLB in the same zone as the target Instance Pool:
exo compute load-balancer create mynlb --zone ch-gva-2 --description "Exposing my application to the internet"
 ✔ Creating Network Load Balancer "mynlb"... 6s
┼───────────────────────┼─────────────────────────────────────────┼
│ NETWORK LOAD BALANCER │                                         │
┼───────────────────────┼─────────────────────────────────────────┼
│ ID                    │ 988e7d8e-5841-451a-995a-8b5b48ac071c    │
│ Name                  │ mynlb                                   │
│ Zone                  │ ch-gva-2                                │
│ IP Address            │ 91.92.152.147                           │
│ Description           │ Exposing my application to the internet │
│ Creation Date         │ 2025-05-19 08:26:43 +0000 UTC           │
│ State                 │ running                                 │
│ Services              │ n/a                                     │
│ Labels                │                                         │
┼───────────────────────┼─────────────────────────────────────────┼
The command returns the NLB ID, state, and public IP address. You can retrieve the information again at any time:
exo compute load-balancer show mynlb --zone ch-gva-2Add a Service
Add a TCP service that listens on port 80 and forwards traffic to port 80 on
the web Instance Pool:
exo compute load-balancer service add mynlb web-http \
  --zone ch-gva-2 \
  --instance-pool web \
  --protocol tcp \
  --port 80 \
  --target-port 80 \
  --strategy round-robin \
  --healthcheck-mode tcp \
  --healthcheck-port 80
Inspect the configured service:
exo compute load-balancer service show mynlb web-http --zone ch-gva-2For all supported service and health-check options, see the
exo compute load-balancer service add reference.
Verify the Endpoint
Wait until the NLB and its service report a running state. For an HTTP application listening on port 80, send a request to the NLB public IP:
curl http://<nlb-ip-address>If the request fails, confirm that the target application is running, the health check is passing, and the target instances allow the required traffic.
First Steps via Portal
Create a Network Load Balancer
In the Exoscale Portal, select Compute, then Load Balancers. Select Add to open the NLB creation form.
Enter:
- a unique name;
- the zone containing the target Instance Pool;
- an optional description.
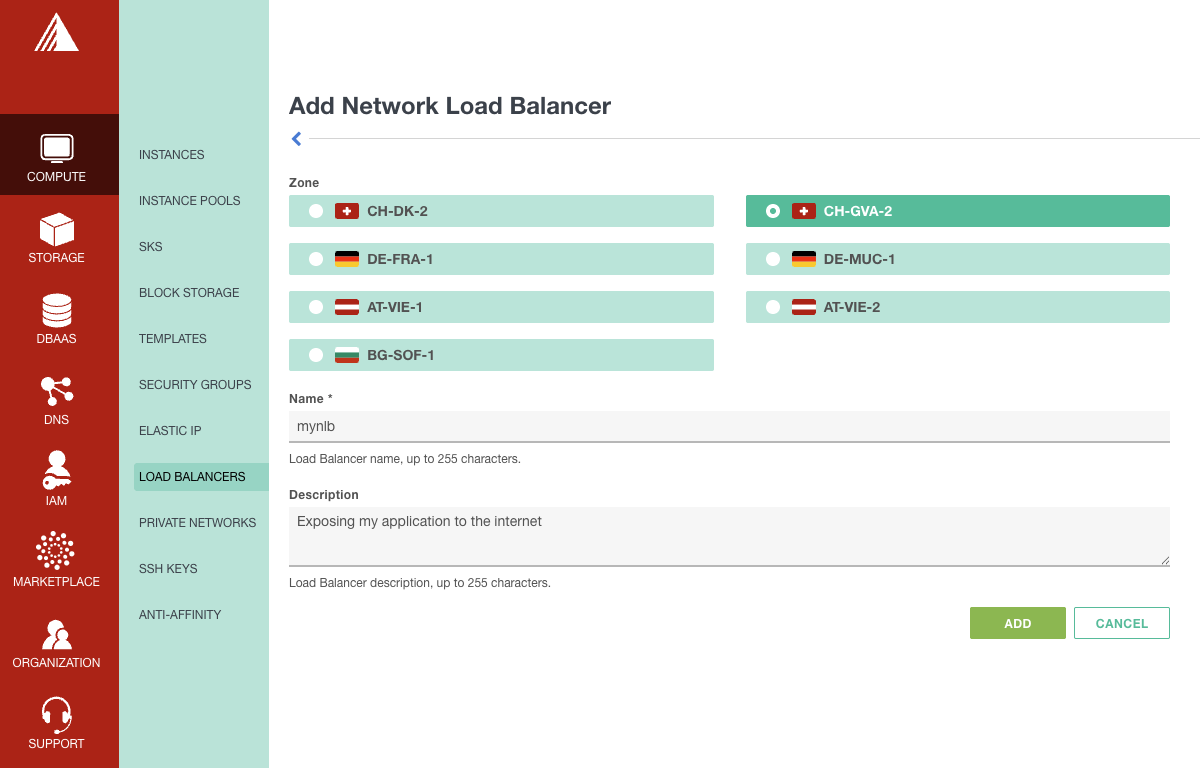
Submit the form. After the NLB is created, the list displays its state and public IP address.

Open the NLB Details
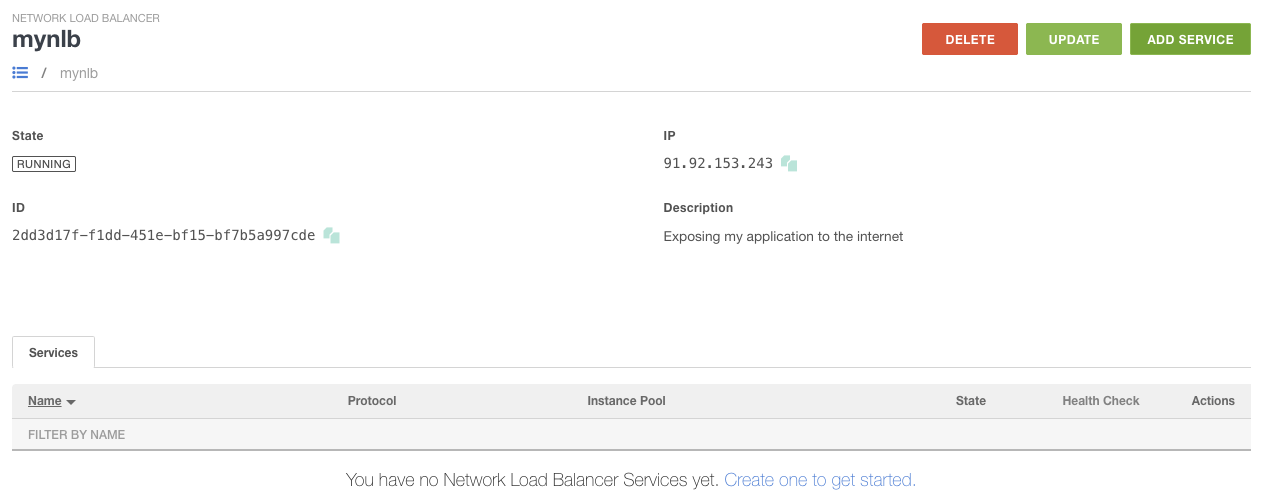
Open the contextual menu for the NLB and select Details. The details view shows the NLB configuration, public IP address, state, and configured services.
Add a Service
Select Add Service, then configure:
- a service name;
- the target Instance Pool;
- TCP or UDP;
- the public service port;
- the target port used by the application;
- the load-balancing strategy;
- the health-check mode, port, interval, timeout, and retry settings.
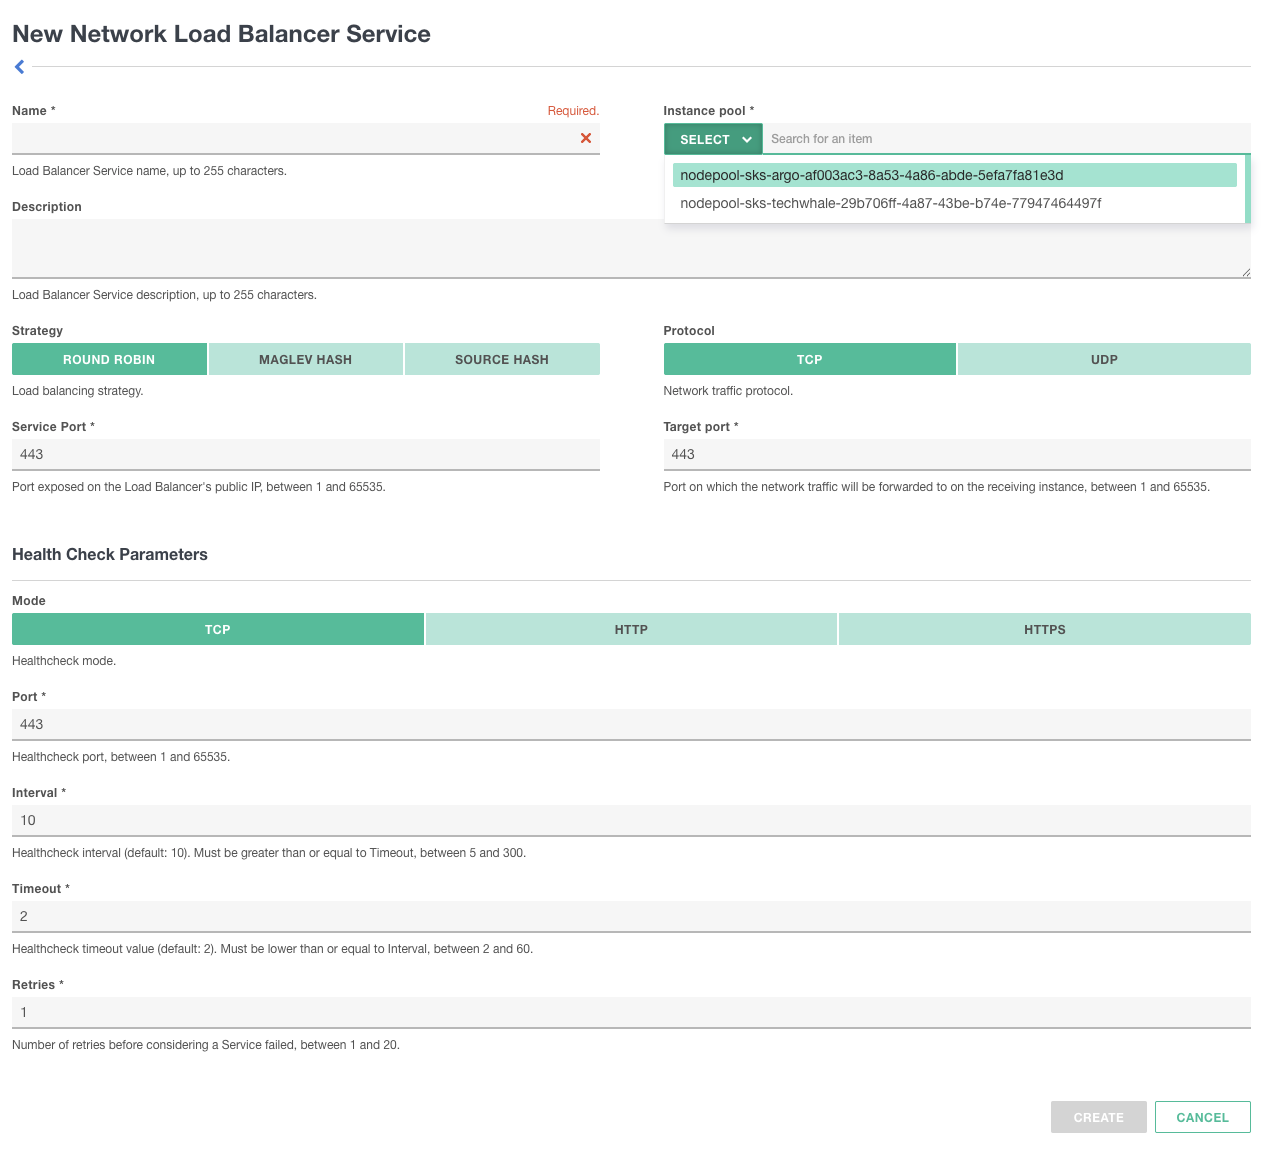
Submit the form and wait for the service to report a running state. Confirm that its health check succeeds before sending production traffic to the NLB.
Verify the Endpoint
Copy the NLB public IP address from its details page. For an HTTP application
listening on port 80, open http://<nlb-ip-address> in a browser or run:
curl http://<nlb-ip-address>Next Steps
- Learn how NLB services, strategies, and health checks work in the NLB Overview.
- Review NLB limits and quotas.
- Manage backend capacity with Instance Pools.
- Browse the NLB CLI reference.