Templates
A template on the Exoscale Marketplace is your software packaged in a QCOW2 virtual disk image that includes an operating system and additional software and data.
Templates are offered by the software developer itself, or by template maintainers who manage creating, publishing, maintaining and supporting the respective template.
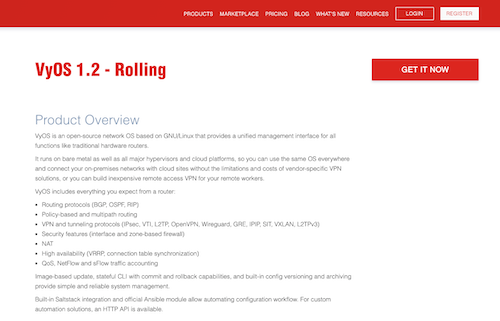
Templates on the Exoscale Marketplace are provided with an individual product page and can be provisioned via the Marketplace, the Exoscale Portal and or the API. The infrastructure costs resulting from running those templates will be billed to the end user.
Roles and Responsibilities for Templates
There are a few different roles involved when publishing a template on the Exoscale Marketplace:
Exoscale
Exoscale is the IaaS provider that provides an organization in which to build your template. We take responsibility for smooth onboarding, billing of your product and acting as the first point of contact for support tickets from customers using your template. Furthermore, we provide documentation for creating templates and your product page. We advertise your templates to customers via our website and implement sales enablement activities to drive revenue. To support the software developer and maintainer, we provide a single point of contact and support.
Template Maintainer
The template maintainer is the creator and maintainer of the virtual disk image for the software. The maintainer is the contracting party for Exoscale and is the party that signs the Exoscale Marketplace Framework Agreement. In this role, the template maintainer is responsible for meeting all commercial and technical requirements and agree with the software developer on applicable license and billing models.
Additionally, constant maintaining, updating and lifecycle management for the template, as well as and alignment of the marketplace content with the software developer, is the template maintainer’s responsibility. In many cases, the software developer will also fulfill the maintainer role.
Software Developer
The software developer is the manufacturer of the software. They provide the template maintainer with all the necessary rights and means to create a bring-your-own-license (BYOL) or pay-as-you-go (PAYG) template on Exoscale.
Purchase of Templates
A customer can purchase your template in the PAYG model, or start your template in the BYOL model, through the Marketplace product page in the Exoscale Portal or through our API.
For PAYG templates, the pricing structure or license types need to be clearly outlined in the product page. Additionally, the end user license agreement needs to be included, as well as a disclaimer to notify the customer that by starting a template, the user agrees to these terms and conditions.

After clicking on GET IT NOW on the product page of your template, the user is directed to the instance creation page in the Exoscale Portal. Your template and the machine type of your choice is selected by default.
Onboarding Process for Reselling Templates on the Marketplace

Contract
After contacting Exoscale about becoming a vendor and an initial call with Exoscale, you will receive the framework agreement as the contractual basis for our cooperation.
In the Special Product Terms for your product that is provided as a template, you will need to detail the pricing and billing model. After you sign the contract, Exoscale will start to configure the metering and billing system based on the conditions in your Special Product Terms.
Creating the image
The next step is to create your virtual disk image based on the technical requirements.
Deploy and test on Exoscale
After creating the image, you will need to deploy and test it in your own Exoscale organization. If you do not have an account, you can register on the Exoscale Portal.
Afterwards, create your template using the Custom Template feature in the Portal. You can find a detailed, step-by-step guide on how to create custom templates in our documentation.
Make sure to test your image thoroughly before you put it into production. We grant Marketplace vendors a monthly free credit of 500 CHF to help support this process.
Provide website content
To market and sell your product on the Exoscale Marketplace, we will publish a product page. Together with the contract, you will receive an spreadsheet that needs to be completed by the template maintainer with all the information we need to set up the product page for you. After you complete the spreadsheet (with 1 spreadsheet file per product), send it to your Exoscale point of contact for review.
Confirm availability
When your template is ready to launch, your website content is approved by the Exoscale point of contact. If you want the image to be published in general availability for all Exoscale customers, send a request to support@exoscale.com with the following:
- Make the email subject: “Publish template (your template name)”.
- Template ID and the
image.yamlfile as per the technical requirements for building a marketplace template. - Attach your spreadsheet with product page content.
Exoscale support will send you a notification after your template has been launched on the Marketplace and the Portal.
Support
Which level of support to make available to your customers is at your discretion. Your support information needs to be detailed in the Special Product Terms as part of the Exoscale Marketplace Framework Agreement, and in the product page of your template. We advise vendors to at least provide documentation on how to start the template to lower hurdles for users and drive usage.
If you offer customer support for your product, please publish the contact details or website on your Marketplace product page.
When we receive support tickets about your product, we cannot give support for your product. However, we will act as the first point of contact, and will dispatch tickets to your named support contact after we exclude any possible IaaS related issues by adding your support email address to the ticket thread.
More on Marketplace Templates
- Technical requirements for building a Marketplace template.
- Commercial requirements for reselling templates on the marketplace.
