Exoscale Migration Guide for Windows Server 2012/2016/2019
Exoscale Migration Guide for Windows Server 2012/2016/2019 via ACRONIS
Activate your Acronis Cyber Cloud Account
Login to your Acronis Cyber Cloud account at cloud.acronis.com.
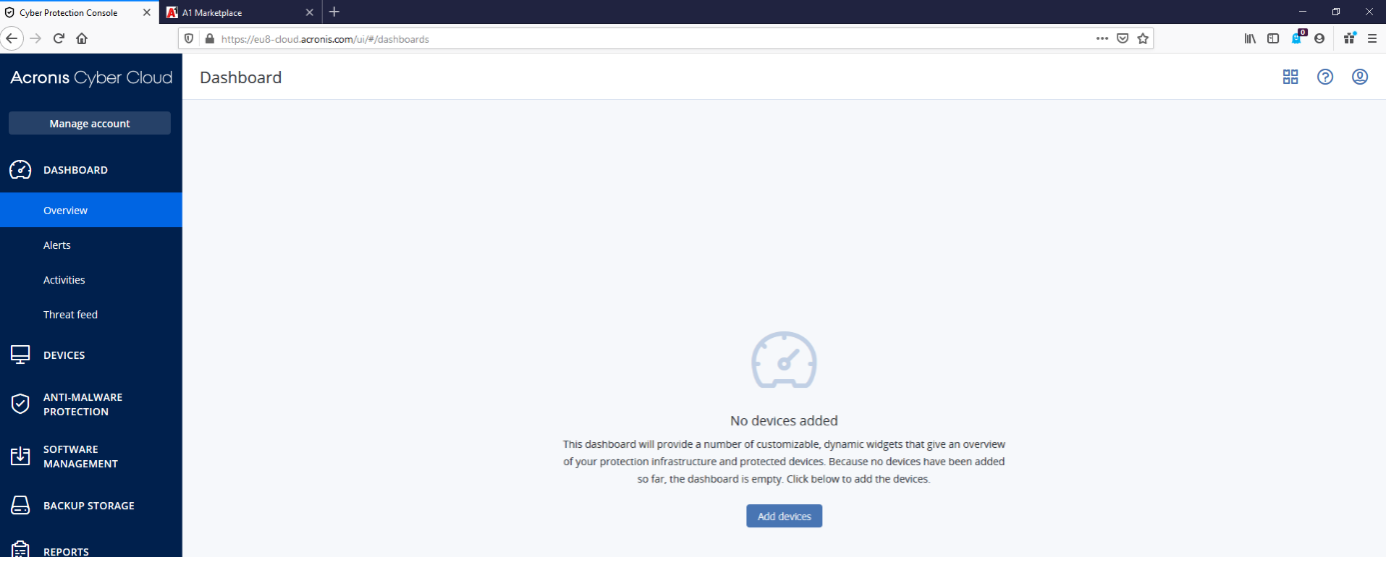
Click on Add devices and download the Acronis Cyber Backup Agent for Windows.

Transfer the download to your Windows server (using a remote desktop client) or you can copy the download link and download the agent directly to your server.
Start the Installation
Click on Install.
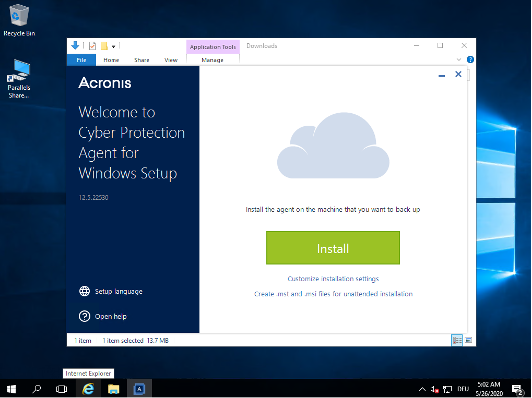
Click on Show registry info.
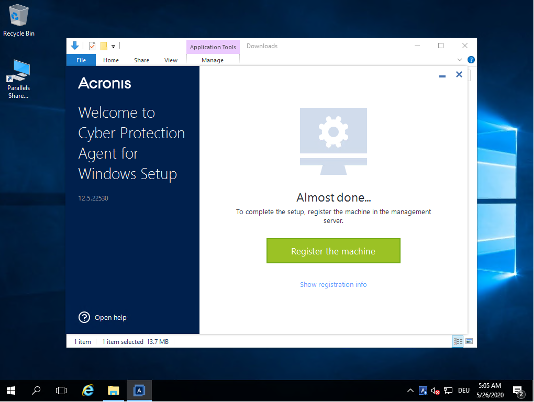
Use this code to register your instance in the Acronis web portal.
Register via Add device, then Register via code.
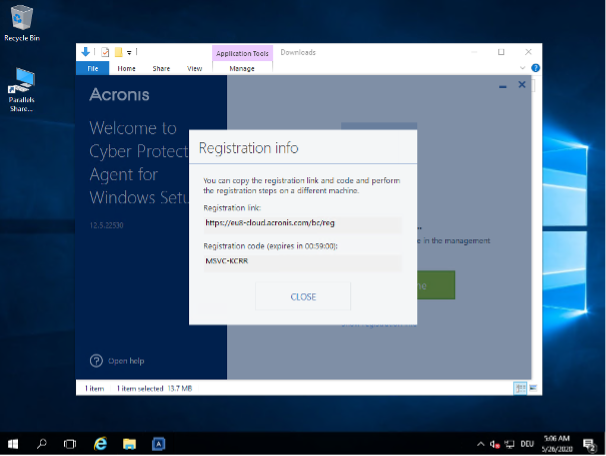
It may take a few minutes for your instance to show up in the ACRONIS portal.
Install the Exoscale Command-line Interface on Your PC or Another Server
Install the Exoscale CLI. You can view our documentation on the CLI for more details and configuration.
To create an IAM key in the Exoscale Portal, click on IAM on the main navigation on the left. Create a restricted key for the Compute service.
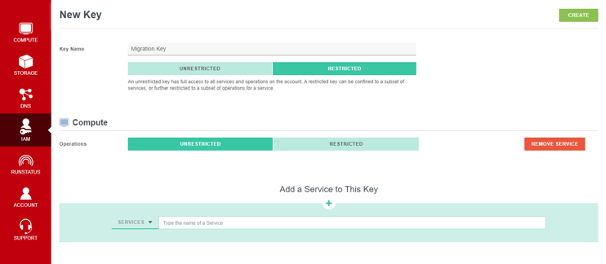
Save the key and the secret. Please do not share the IAM key with third parties.
Enter the command exo config in the CLI. You will now be guided through the CLI configuration, where you need to enter the key and secret you just created in the Portal.
Create a New Instance with This Template on Exoscale
- Log in to the Portal.
- Go to
COMPUTE, thenINSTANCES. - Click on the
ADDbutton to the top right of the header. - For the Template, select Windows Server 2016.
- Note that your disk space should be at least the same size on Exoscale as on your old server.
- Your hostname should be the same as on your old server as well.
While setup of the firewall on Exoscale is not in the scope of this guide, you can find more information in our documentation section on Security Groups.
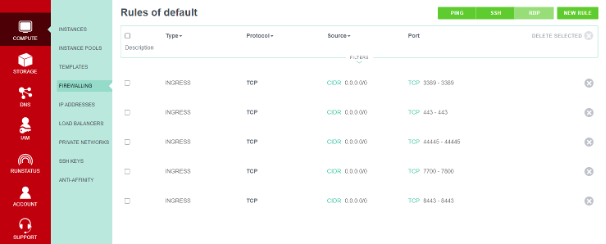
You can use the default Security Group or create your own. To configure the firewall correctly, be sure to allow access via RDP.
In addition, the following ports must be enabled for the transmission of data from ACRONIS:
Ingress TCP 443, 7700-7800, 44445, 8443.
Here you can see an example of a correct configuration:
Starting the New Server on Exoscale
Enter the following command on the CLI to create a new instance, adjusting the information accordingly:
exo vm create bw-prtg-3610-exo -t 7dfd88df-3e6b-4a55-9783-2cae4bd49881 -s sophos_allow_all -o medium -z de-fra-1 -d 220
In this example, we see:
- The hostname of the server (
bw-prtg-3610) - The name of the security group (
sophos_allow_all) - The type of the new server (
medium) - The zone (
de-fra-1for Frankfurt) - The disk size in GB - Which depends on the existing server; at least the size of the used memory with a little buffer. In our example,
220.
Installing Acronis Backup Agent on the Exoscale Windows Instance
- Please follow the same procedure as before when installing ACRONIS on the new Exoscale server.
- You do not need to activate a backup plan for this instance.
- In the ACRONIS portal, go to All Devices and perform a restore from your old instance to the Exoscale instance (your old instance is the one with status OK).
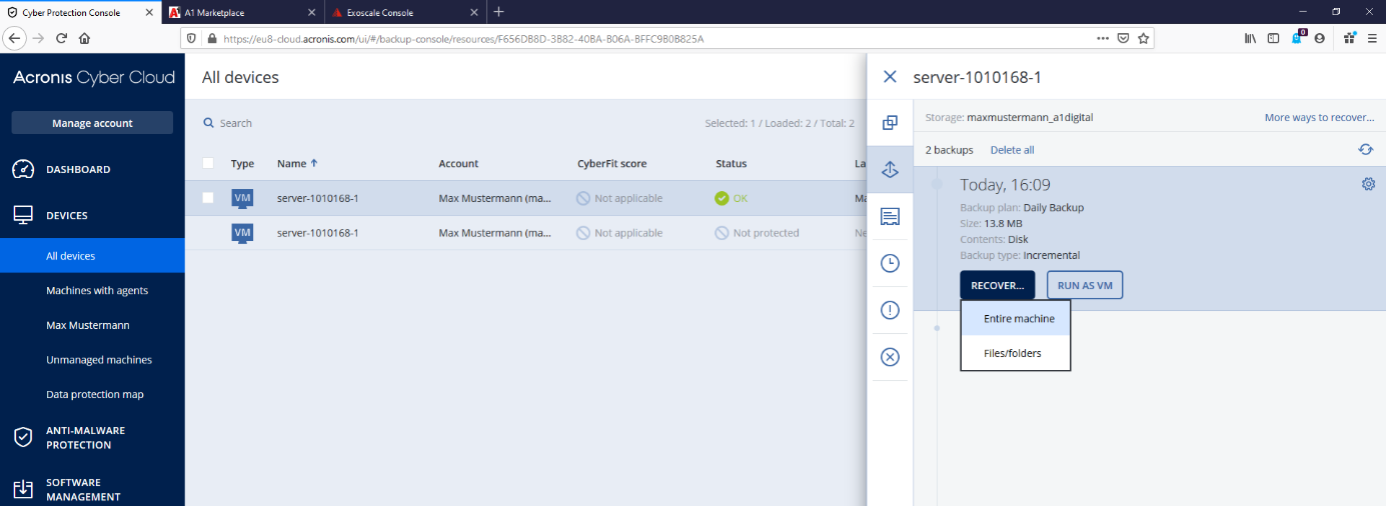
Optional: Add the IP Addresses column to distinguish between your instances, and select your Exoscale instance as the destination.
- You do not need to change any other settings.
- Select the Exoscale target server and disk here.
- Note: If your original system has two partitions, Disk2 of the existing server will be restored in one of the next steps, skip the message in the ACRONIS portal which indicates this.

- You do not need to change any other settings.
- Select the Exoscale target server and the corresponding disk.
- Note: If your original system has two partitions, Disk2 of the existing server will be restored in one of the next steps, skip the message in the ACRONIS portal which indicates this.

You will now lose access to your Exoscale instance as the computer reboots and the restore starts.
- You can check the status in the Exoscale Portal:
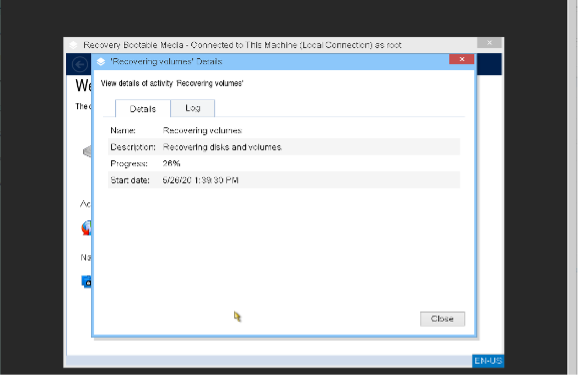
The restore fails with the following message. Now stop your instance from the Exoscale Portal.
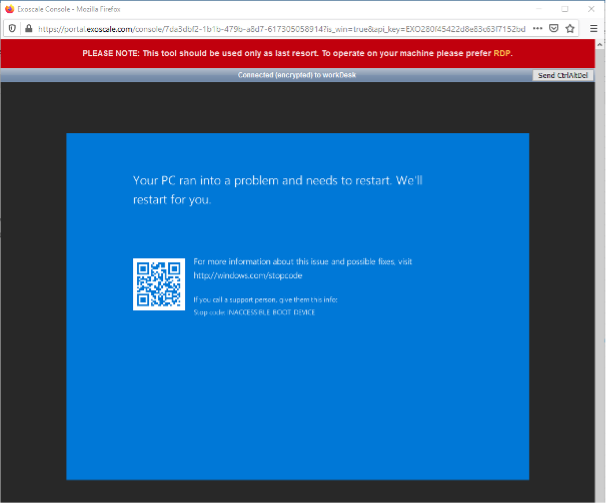
Windows will automatically restart after a few minutes. If you see a screen asking you to select a keyboard language, the restart is already done and you can proceed to the next step.
Importing the Drivers
Boot your Exoscale instance into “netboot-efi” mode to deposit required VirtIO drivers into the recovery using following command:
exo vm start --rescue-profile=netboot-efi <servername>
Open Portal again and scroll down to Windows:
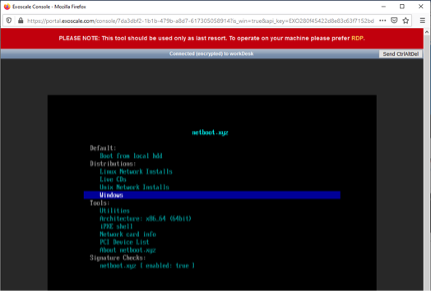
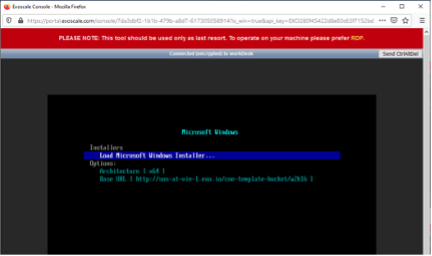
Select Base URL and enter the following URL:
http://sos-at-vie-1.exo.io/coe-template-bucket/w2k19 for Windows 2019
http://sos-at-vie-1.exo.io/coe-template-bucket/w2k16 for Windows 2016
http://sos-at-vie-1-exo.io/coe-template-bucket/w2k12 for Windows 2012
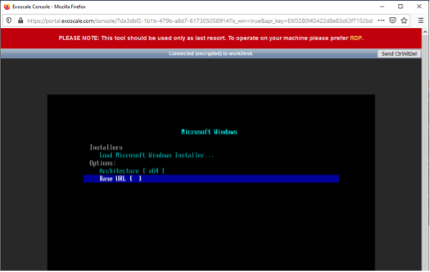
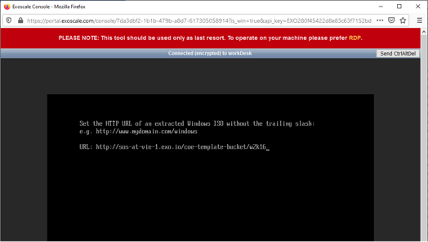
Go to Load Microsoft Windows Installer and press enter.
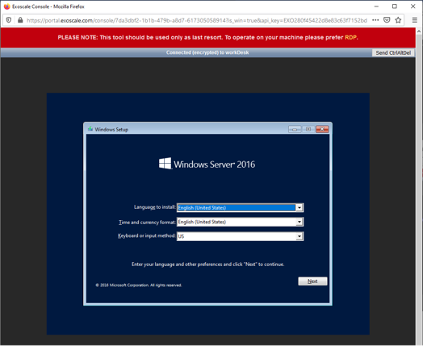
Click on Next.
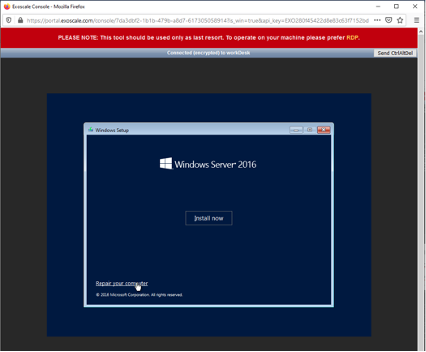
Click on Repair your computer.
Now click on Troubleshoot and then Advanced options.
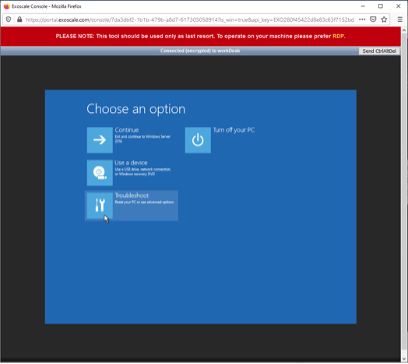
Then click on Command Prompt.
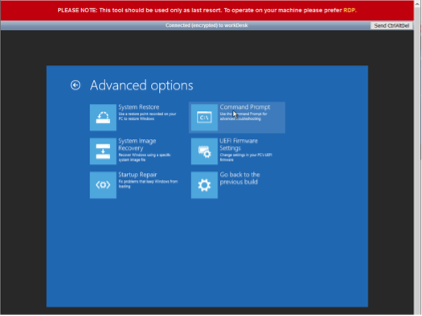
Add the required drivers to your Windows instance. Enter the following command:
dism /image:C:\ /add-driver /driver:X:\drivers\vioscsi.inf
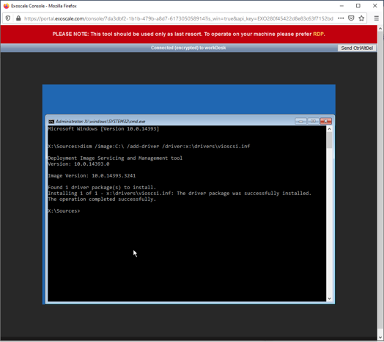
Then enter this command:
dism /image:C:\ /add-driver /driver:X:\drivers\viostor.inf
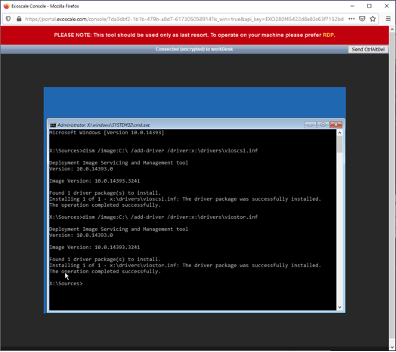
Lastly, install NetKVM with the following command:
dism /image:C:\ /add-driver /driver:X:\drivers\netkvm.inf
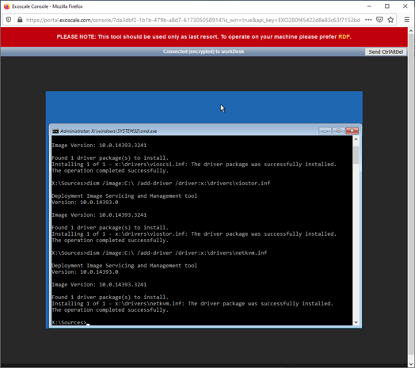
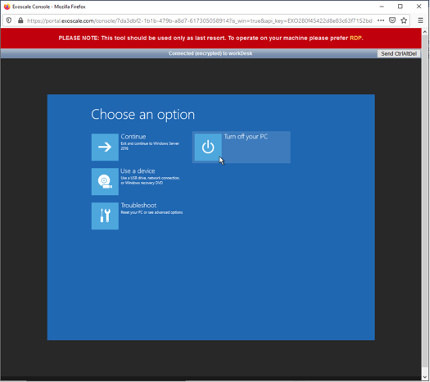
Exit the console with the exit command and click on Turn off your PC.
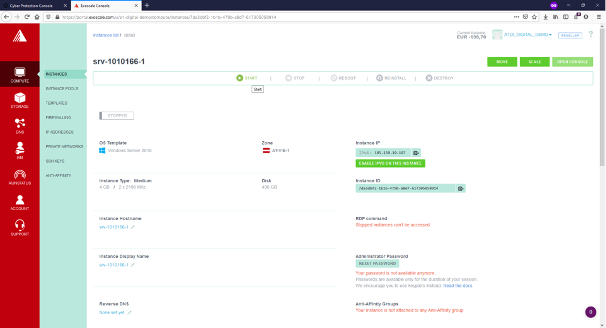
You can then restart your instance with the Portal:
Adjust the Partition Sizes on Your Exoscale Server (Optional)
- Open the disk management on the new server.
- Shrink the C: partition to the appropriate size of the existing server (this will take a few minutes).
- Create an additional partition (D:) with the remaining disk space.
- Restart the server.
Restore the 2nd Disk (Optional)
- Uninstall or disable the ACRONIS client on the original server.
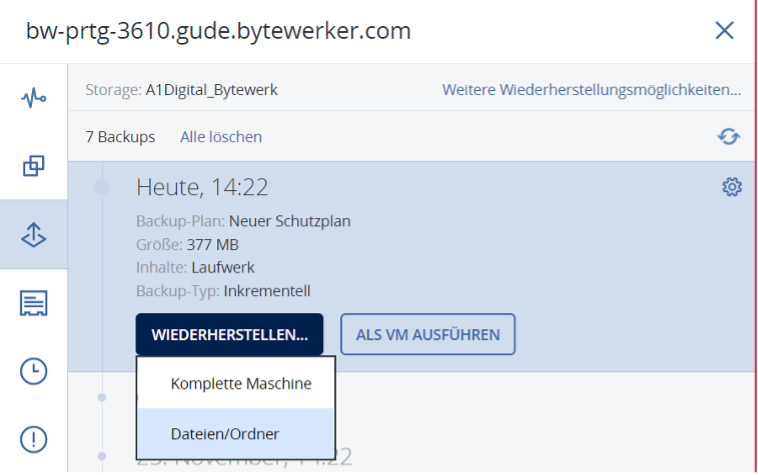
- Go back to your ACRONIS portal and select the original server. Click on Recovery, then Restore and Files/Folders.
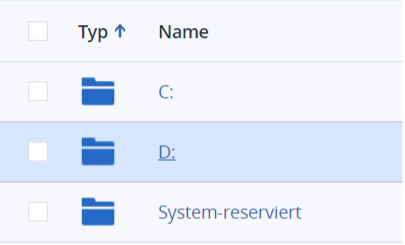
In the folder selection, choose the D: folder.
A selection of folders will appear. Select the folder with the name of the server. Then you can leave the selection and click on Start Recovery.

The restore will now take some time, depending on the size.
Install CloudBase
- Log in to your new server and download and install Cloudbase.
- Use the .msi file we have provided to download Cloudbase.
- During the installation, please note to the username.
Remove the Server from Acronis Portal
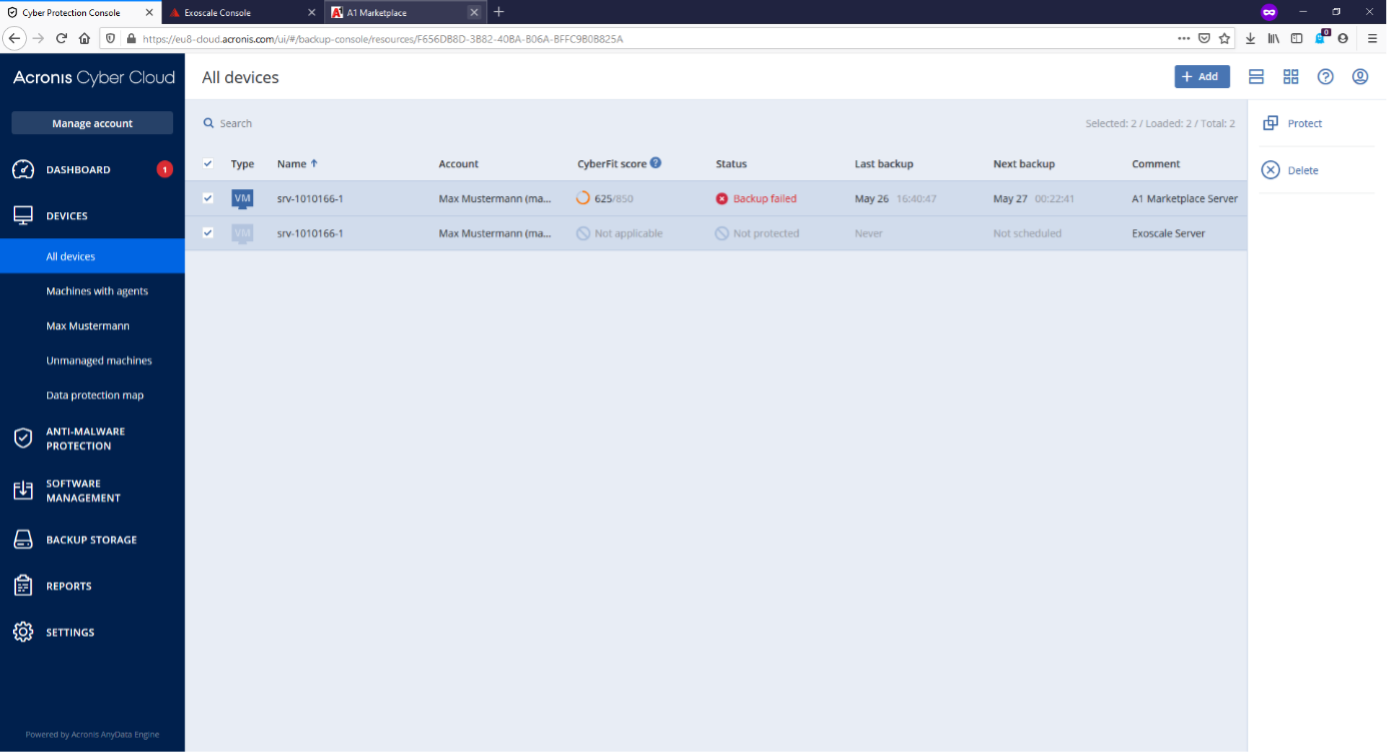
- Highlight both servers and click Delete button.
Exchange the Windows Product Key (optional)
Lastly, the product key on the new Windows server must be changed to Exoscale. This can be done directly in Settings, then Update and Security then Activation.
Please request the product key from our support team at support@exoscale.com or directly in the Portal under SUPPORT.
